Hello, and welcome back to the Vandemonian Homesteader. I hope life has been treating you well these past few weeks.
The temperatures are dropping in Hobart, and you can tell winter is right around the corner. To be honest, I wish it would wait a little longer. Autumn has always been my favourite time of year. I love the comfortable, cooler temperatures, and I’m a sucker for the autumn colours.

First, I do apologise for not posting these past couple of weeks and dropping off the face of the earth. Some things at work demanded a lot of my attention and time. Once that was dealt with, I took a quick little getaway up into the mountains to recharge my batteries and see the Fagus trees turn before returning to the task at hand. And what a task it is.
In my last post, I said I would dismantle and rebuild some garden beds and build a wooden planter box for some herbs. The problem with this plan is that my tomatoes are currently sitting in one of the beds I have marked for demolition, and they are still producing fruit, so I think I will leave that one for another couple of weeks until they have finished. I am really enjoying harvesting, cooking, and eating these tomatoes right now, and I don’t want to go ending the fun prematurely.
Building a planter box for a herb garden is still on the agenda. And considering that the new garden beds will have to wait a bit longer, I thought I should probably start making some compost for the upcoming spring and summer seasons. I will need a compost heap to do that, but that’s a task for next week. Today, we will be taking a look at upcycling wooden pallets into planter boxes.
Upcycled timber planter box
I have been thinking for a while now about putting some pots on the back doorstep and growing some herbs for my cooking. The back steps are right by the kitchen, so having herbs there makes more sense than anywhere else in the yard, as they can be accessed quickly and easily.
I also didn’t want half a dozen pots clogging up the back doorstep becoming a trip hazard. So, to fix this, I will keep them all in a timber planter box. This timber box had to be made as cheaply as possible. If you remember my rules from the last post, I have to upcycle as much as possible. I didn’t want to use any of my gardening budget for this as I wanted to save it for when it’s needed. So I had to get creative on where I sourced my materials from, which begs the question: where can you get timber for next to nothing?
Well, more often than not, instead of throwing out bits of wood, people will advertise them for free or cheap through Facebook Marketplace or Gumtree. Carting it to the tip can be costly and time-consuming, but throwing it online for free eliminates that hassle and costs you nothing. I have done it in the past for previous renovations, and by the end of the day, my waste had been taken care of. So, if you are looking for cheap or free wood, watch for listings on Facebook Marketplace or Gumtree.
Collecting old shipping pallets is another excellent way to get free wood for your projects. It’s easy to understand why pallet projects are so popular when you look at how much wood you get from one pallet. These can regularly be found in online marketplaces as free items, so I recommend starting your search there. It can often pay to head into a business and ask if you can take some of their used pallets. And if anyone tries to sell them to you, just laugh and walk away and try the next guy. So many people are happy for you to take them for free; you don’t have to pay for them.
Last week, while collecting my car from the mechanics, I noticed a stack of pallets by their bin around the side of the shop. While chatting with the mechanic, I casually asked if anyone would mind if I took some of those pallets. “Help yourself, it’s all trash,” was the response I got. So I loaded up my Ute, and after an hour of pulling them apart and removing the nails, I now have a stack of usable timber and a jar of nails.
Wooden pallet safety
Before I go any further, I need to share what pallets you can use and what ones you should avoid.
You no doubt already know timber pallets are primarily used to transport goods. As they are moved around from place to place, they can also transport mould, bugs, and other pests that have moved into the wood. As these pallets often go from country to country and around the world, there is the potential for introducing a whole range of invasive species into new environments.
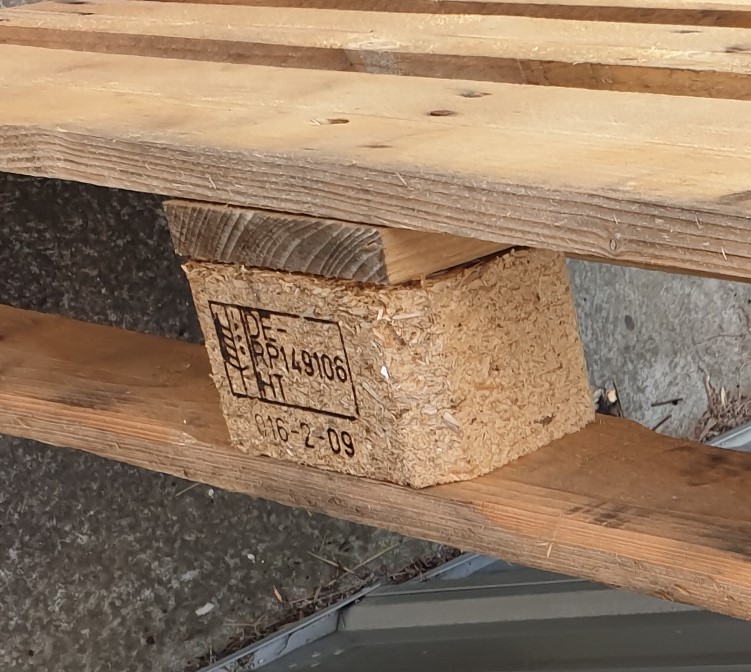
To combat this, pallet manufacturers treat their pallets with either heat or chemicals. Thankfully, pallets are generally marked with a code that tells you how they were treated. The codes you need to look out for are listed below.
- DB – (Debarked). The wood used has had its bark removed and is as natural as possible.
- KD – (Kiln dried). The wood has been treated with heat by being placed in a kiln and dried.
- HT – (Heat treated. The wood has been dried and treated at temperatures higher than a kiln drying.
- MB – (Methyl Bromide). The wood has been treated with Methyl Bromide and is toxic.
While scavenging for pallets, you may also encounter some that don’t have a code and some that have been painted or marked with various colours, such as blue, red, green, or pink.
Pallets without codes are tricky as they can sometimes be from local or national shipping, where they don’t need to be treated like international pallets. If they have a manufacturer mark, you could call and ask how they treat their pallets, but I just give them a wide berth to be safe and focus on KD or HT pallets.
The coloured pallets’ markings indicate different chemical treatments, so like the Methyl Bromide pallets, they should be considered toxic and avoided.
Dismantling your pallet
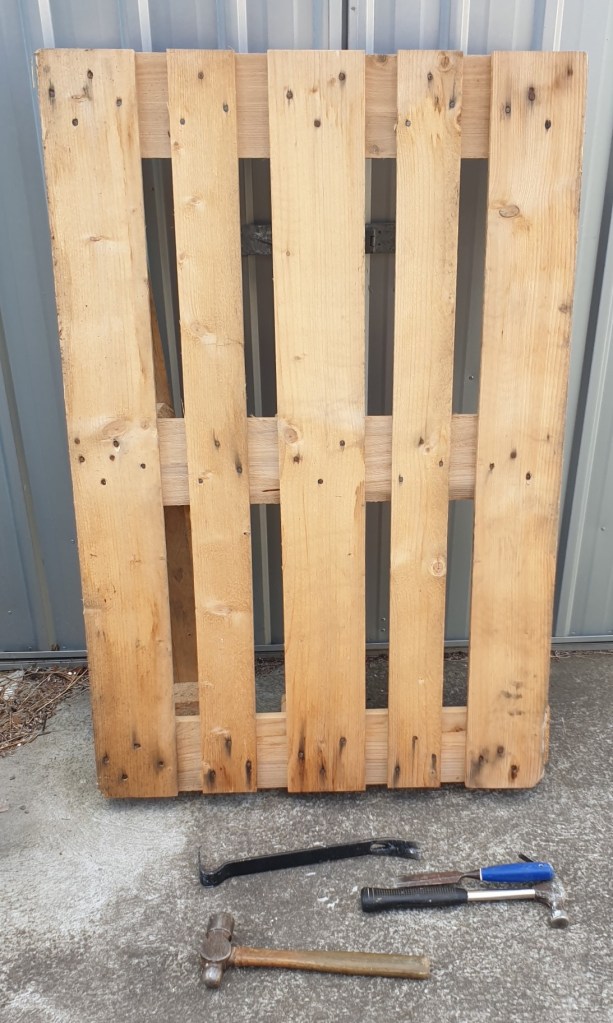
So, you have been scouring the town and found some great little finds. Now they are back home, and you have to begin pulling them apart. This stage is pretty simple but can be time-consuming. I’d recommend taking your time, though, as rushing could accidentally damage the timber.
I used an old chisel, a claw hammer, a crowbar and a large ball-peen hammer for this. Any mallet would do if you don’t have a large ball-pen hammer. You just need something big and heavy in case you need to give something a good whack. For safety gear, gloves and eye protection are recommended.
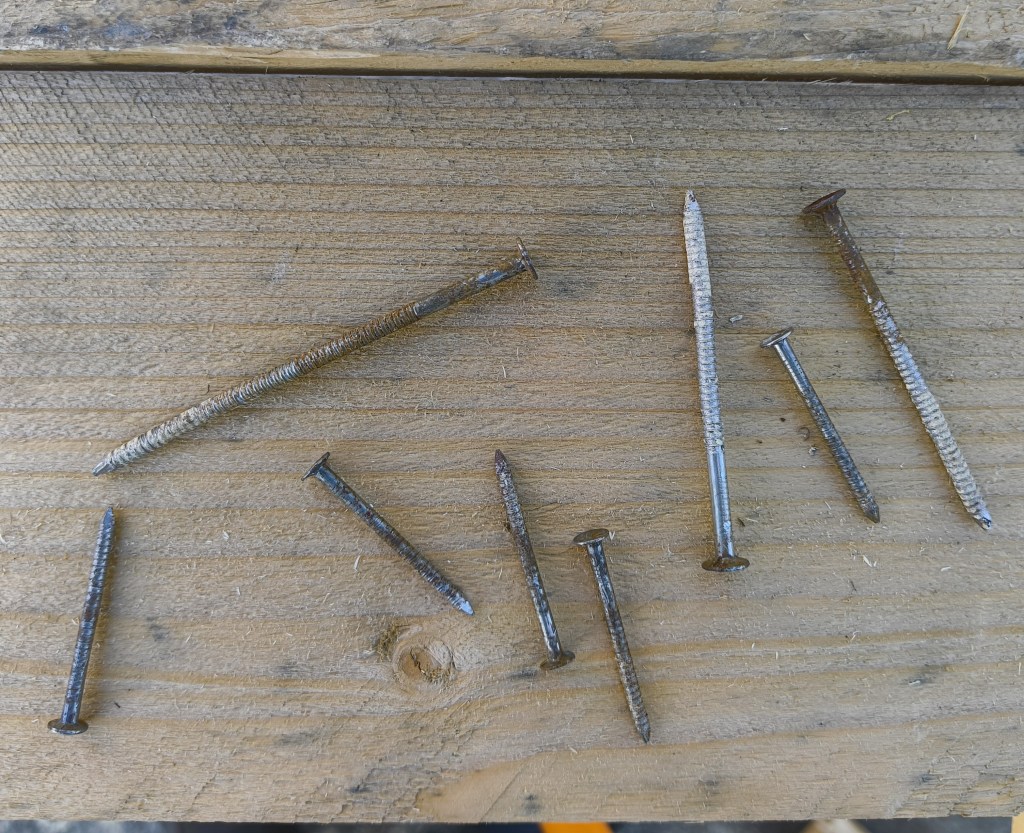
From there, I laid the pallet out on the ground and separated the bits of wood by tapping the old chisel or crowbar between them and prying them apart. I tapped the pointed ends of the nails to push them back through the wood, where I removed them with a claw hammer as usual. Any nails I pulled out were collected into a container for future use.

When the last nail was removed, I stacked all the timber in groups according to size, measured, and counted them so I had a clear idea of how much I had and what sizes there were. The nails I removed were sorted into ones that were still straight and usable and those that were as crooked as a dog’s back leg.
At this point, I measured the part of the back steps I wanted the planter to sit on. I spent some time rearranging the timber to determine how I wanted it to look and whether or not it would work in the location I had in mind.
Once I had an idea of how I wanted it to look, I took some rough measurements of the step. I began measuring and marking the boards to the needed sizes, preparing them to be cut.
I decided to go with a very simple box with the following measurements. I used a circular saw, a pair of saw horses, clamps, a hammer and measuring tape. I recommend using the following safety gear: eye protection, gloves and hearing protection.

L – 940mm, W – 245mm, D 280mm
I measured and cut the following
- Four 900mm lengths for the sides.
- Four 245mm lengths for the end pieces.
- Four 240mm lengths will be used to hold everything together.
Starting with the side pieces
I applied a bit of wood glue to the 240mm piece and sat it facing up on the workbench, or in my case, saw horse. I then positioned one of the 900mm long boards on top, ensuring they were square and nailed them together.
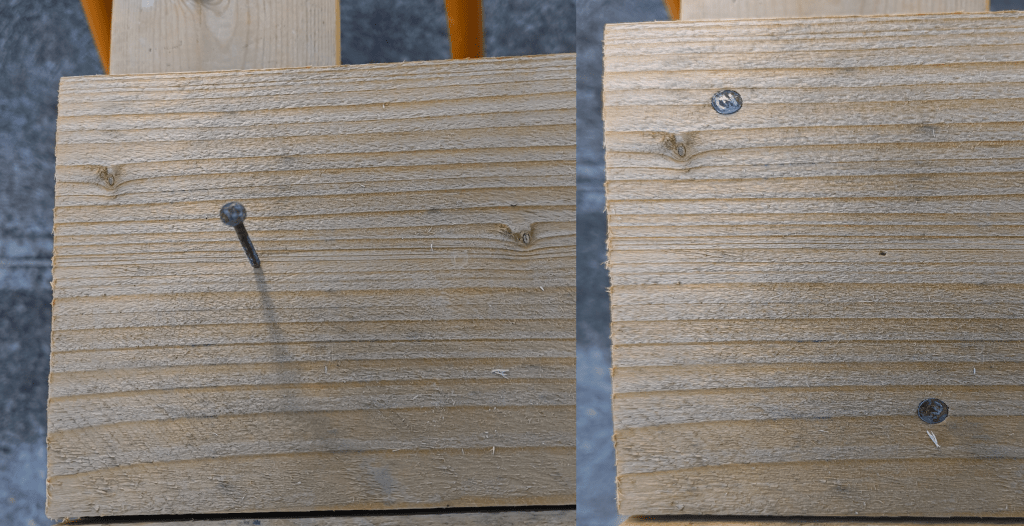
The best way to go about this is to stick a nail in one corner and, once it’s in, put another in the opposite corner. Avoid nailing something in the dead centre, as it won’t hold anything.
When the first two boards are nailed together, add the second 900mm board and then add another 240mm piece at the opposite end. In the end, you should have something that looks a little similar to this.
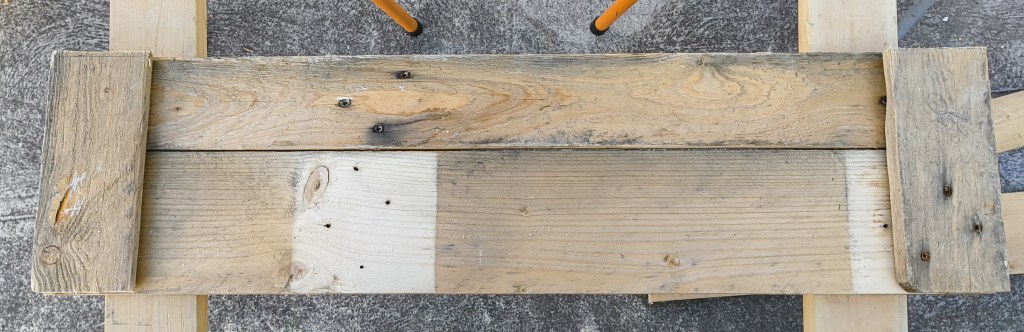
I repeated the process, creating the second side piece.
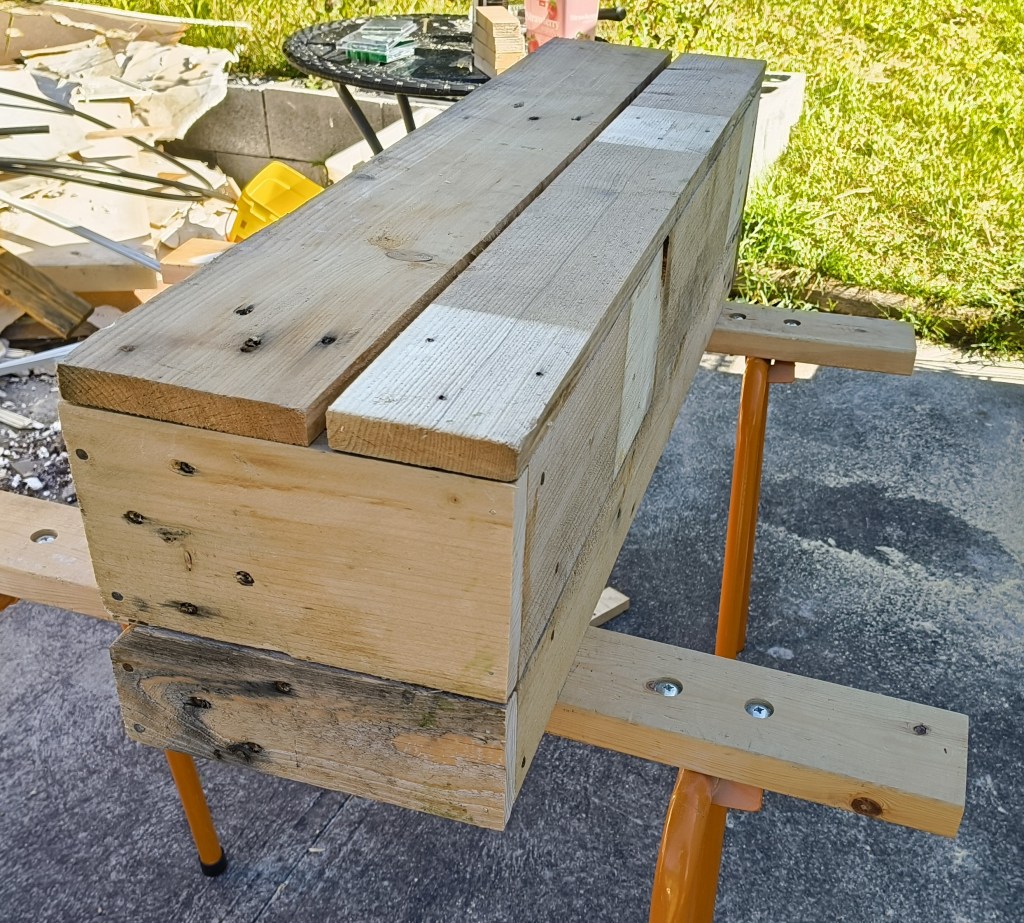
The end pieces
I used the end pieces to hold the two sides together. They were easily attached by adding a few drops of wood glue to the edges and lining them up on the end of one of the sides you just made. Carefully nail them together before repeating this process with the other three end bits. Another great point worth sharing at this point is that it often pays to drive your nail in on an angle. Having your nails at angles makes it harder for the parts you are nailing to work themselves or be pried loose. It’s a great way to add a little more strength to whatever you’re nailing.
Once you are done, the sides of the box should be able to stand up by themselves, and it may look a little something like this.
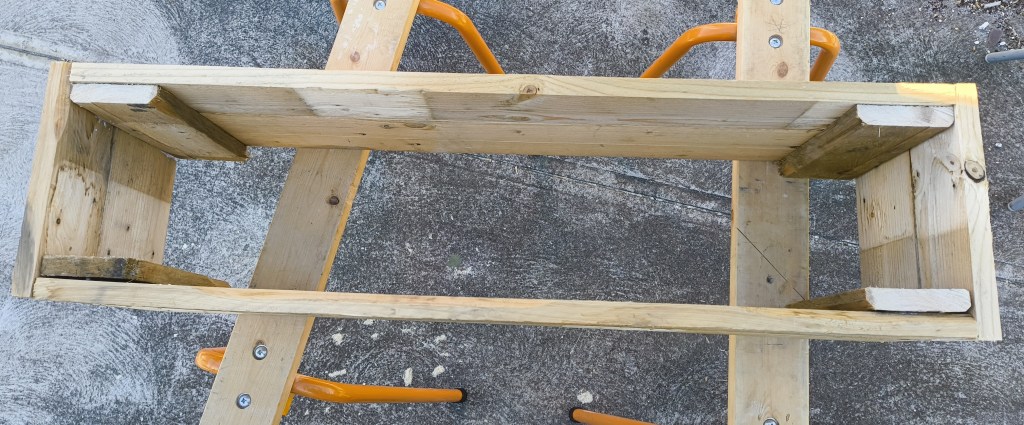
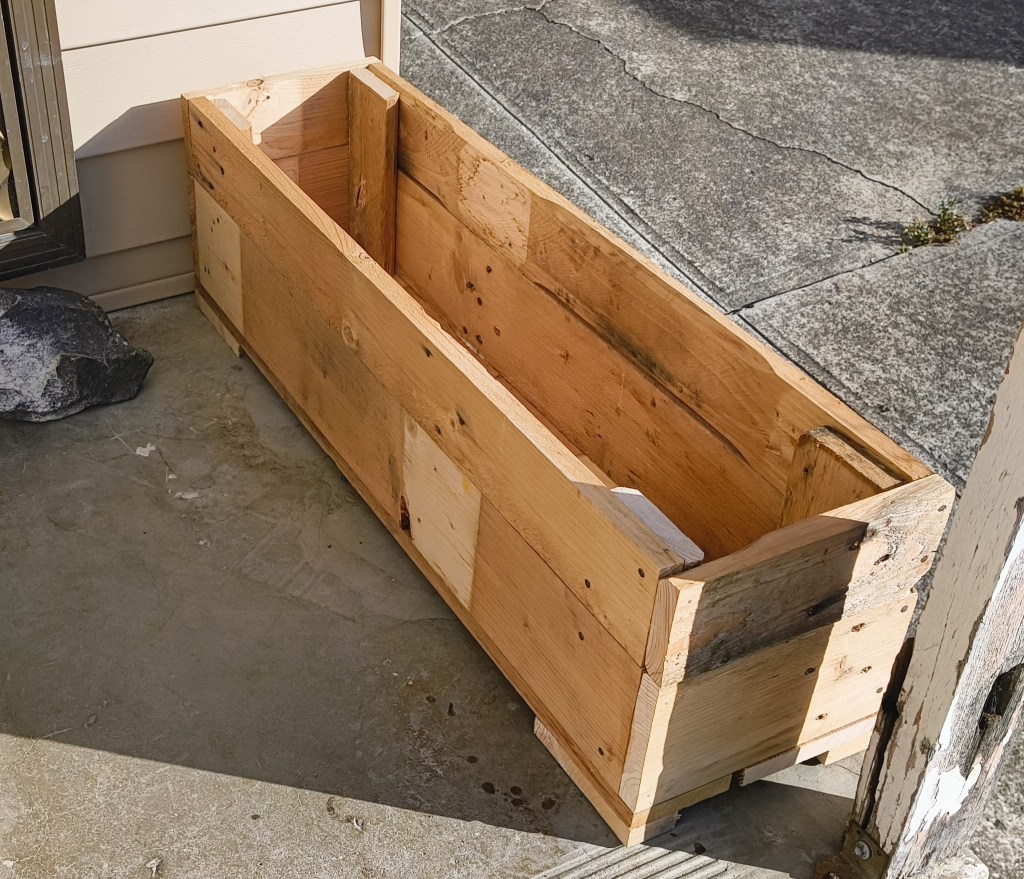
Now for the base
When adding the base, I didn’t want to completely seal up the bottom of the planter as I wanted plenty of space for water to drain through. To achieve this, I chose two narrow bits of wood and had them run down the length of the planter. As you can see from the pictures, there is plenty of support for the pots I will place inside, and there is more than enough space for any water to drain.
To finish it all off, I collected a couple of offcuts, glued them, and then nailed them to the corners of the base, giving my planter box some feet to help lift it up off the ground.
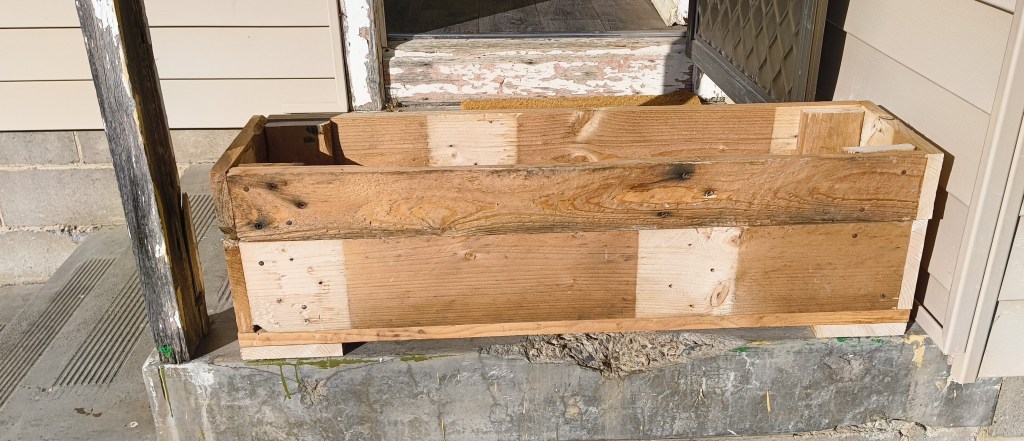
And with that, I called it a day. If you were to make something like this at home, you could do a lot more to this box if you wanted to. The sky is the limit, to be honest. Giving it a sand and a coat of paint is a great way to make it stand out. I quite like the rough used look of the timber, which is part of the reason why I left it as it is. I was tempted to lightly sand it and give it a coat of Tung oil, but I decided against that idea as I wanted to keep things cheap and easy for now. But as I said, if you were doing this at home, go nuts and make it look amazing!
In the end
Overall, it took just under a day to make, from pulling apart the pallet to finishing the planter. If you decide to paint or decorate one, it will obviously take longer.
The timber pallet was free, and I used all of the small nails I pulled from it. I had to use some more nails from my tool chest that were leftovers from another project, and I used a bit of wood glue as well. The glue and nails would have cost a little under ten dollars. So, all in all, I’d say that’s a day well spent. A day’s work, roughly $10 and I’ve now got a nice planter box to put my herbs in. Over the next week, I will do just that, and next week, I will share some pictures of it, complete with pot plants filled with seeds and soil.
As I said earlier, I thought I should get a compost heap underway because I have to wait for my tomatoes to finish before I can reorganise my garden beds. So join me next week as I discuss composting 101—everything you need to know to prepare a compost system for spring.
Until then, thank you very much for dropping in. Have yourself a good one, and I will catch you later.

Leave a comment