
Hello, and welcome back to the Vandemonian homesteader; as usual, I hope the past two weeks have been treating you well. Down here in southern Tasmania, the days are getting noticeably shorter, and the weather is getting cooler. The last of the summer vegetables are also being harvested, making for some great meals. However, while I enjoy the cooler temperatures we’ve been getting recently, I am beginning to miss the longer days that summer allowed. Unfortunately, I can’t have both, although it would make for some great days in the garden if I could.
Today, I thought I would share a recipe for making soap. I know in this day and age, it feels like every man and his dog is making specialty craft soaps and selling them on Etsy or at little boutique stores, and as great as some of these products can be, personally, I think they are a little overpriced, and gimmicky. But, there is a lot to be said for making your own soap at home and there is a reason why it’s a homesteading staple.
Making your own is a great way to save a few extra dollars, and it gives you a product that isn’t loaded with a pharmacy full of chemicals as some soaps nowadays are.
I have been making my own soap for years and thoroughly enjoyed it. Not only is it fun to try different looks and scents, but I also have sensitive skin that is easily aggravated by most commercial soaps and detergents. I have tried using soaps meant for sensitive skins, but I am not a fan of how expensive they can be, especially when considering the size or quantity of what you get for the price you pay. However, making my own soap has been a godsend as it is perfectly fine for me to use, and I have been doing so for years without issue.
Another perk of homemade soap is that it doesn’t take long before you end up with a decent-sized stash of bars. You will never run out if you make a batch every few weeks. This also allows you to give them out as gifts to friends or family. In fact, I guarantee they will ask or at least heavily hint at trying some as soon as they find out that you’re making soap.
Before we begin, however, it is worth mentioning that although this is a straightforward recipe, the products you are making are initially dangerous to exposed skin. You will need P.P.E (personal protective equipment) and a well-ventilated space to make this as it does give off some nasty fumes. At the very least, rubber gloves and a mask should be used when making soap at home. If you want to be extra safe, get a protective apron and possibly some eye protection. Still, provided you are careful not to splash or spill any ingredients while mixing, I don’t believe the apron or eye protection is necessary; that bit is entirely up to you.
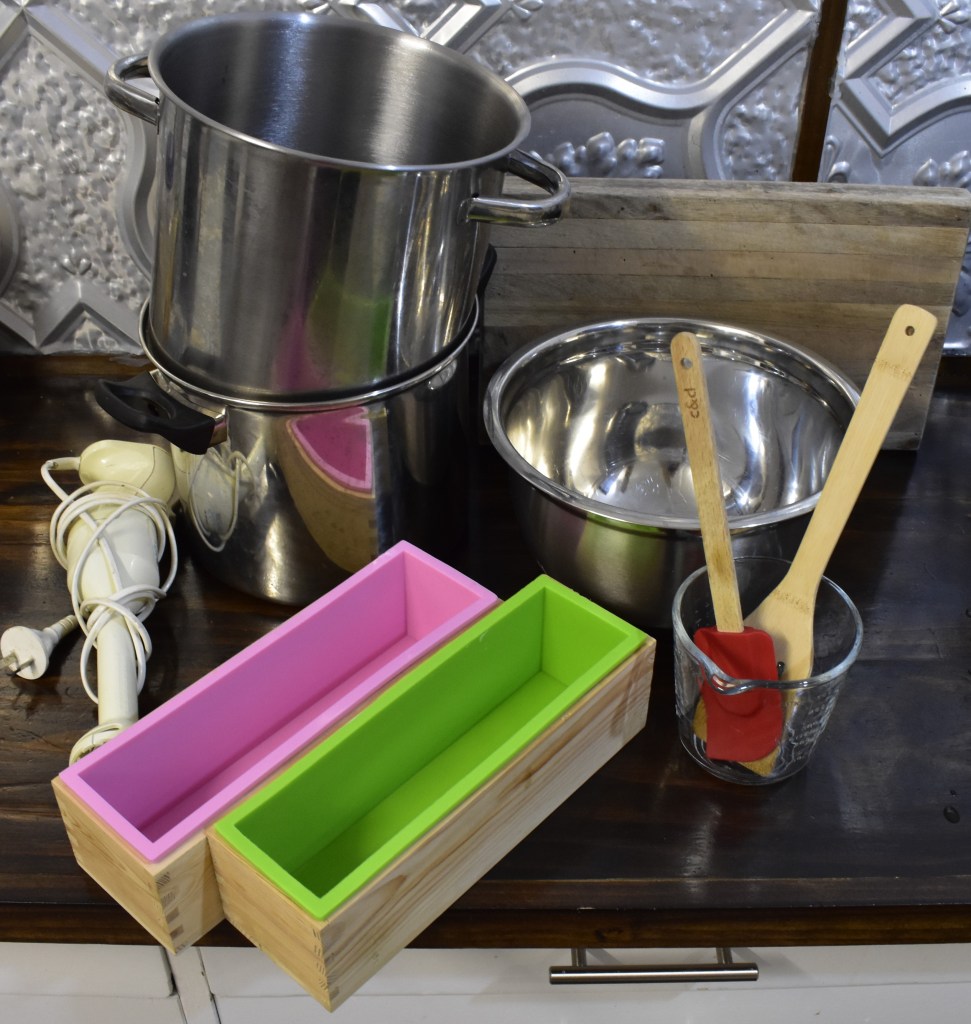
Equipment needed
- Kitchen scales
- Digital probe thermometer
- A wooden or silicone spoon
- A silicone scraper/spatula
- A large stock pot
- A large stainless steel bowl
- Silicone soap moulds or silicone bread loaf moulds
- A stick or immersion blender
- Large chef knife or soap cutter
- Cardboard box
Ingredients
- 450ml water
- 172gm of caustic soda
- 1000gm of olive oil
- 250gm of coconut oil
- essential oil of your preference ( this part is optional )
Method
- Weigh and measure your ingredients, pouring the water into the large stainless steel bowl.
- Carefully pour the caustic soda into the bowl with the water. I originally had it written the other way around until a fantastic reader pointed out that to make the process safer, it should always be caustic soda to water, not water to soda. This prevents splashing that could result in chemical burns. Using the wooden spoon, gently stir it occasionally until the caustic soda has dissolved. The caustic soda and water will get hot and produce dangerous fumes, so keep it in a well-ventilated area while you wait for it to cool.
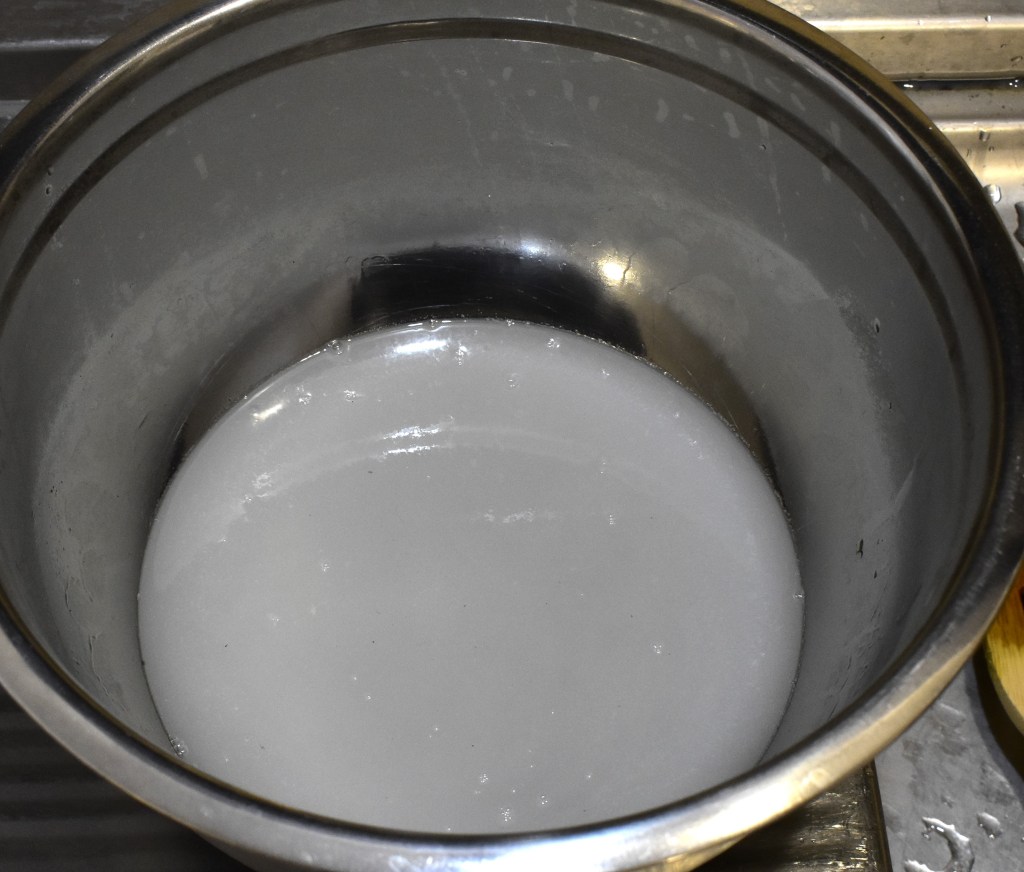
The combination of caustic soda and water creates lye. And as dangerous as it is to have on your skin at this stage, once you mix in the oils, it will begin the saponification process. This is where the lye combines with the oils, turning into soap and becoming safe to use on your skin. I can’t stress enough, however, that during this stage, you must be careful as spilling the lye on your skin can result in severe burns, and the fumes aren’t good to breathe in either.
- While the lye is cooling, place the olive and coconut oil in the stock pot and gently heat until both oils have combined. When the coconut oil has melted into the olive oil, take the pot off the heat and allow it to cool. We don’t want to boil or overheat the oils, and we want to avoid the temperature going above sixty degrees Celsius.
- Now, you will need to use the probe thermometer to track the temperatures of the oils and the lye. Both will need to be fifty degrees Celsius, or at least within a couple of degrees. Keep stirring them gently and checking the temperatures until the desired temperature is reached.
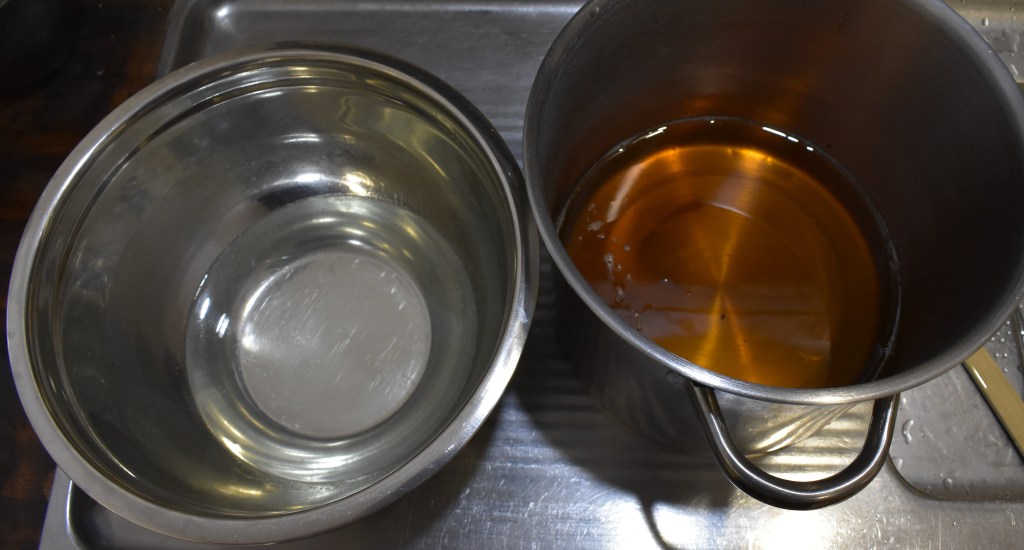
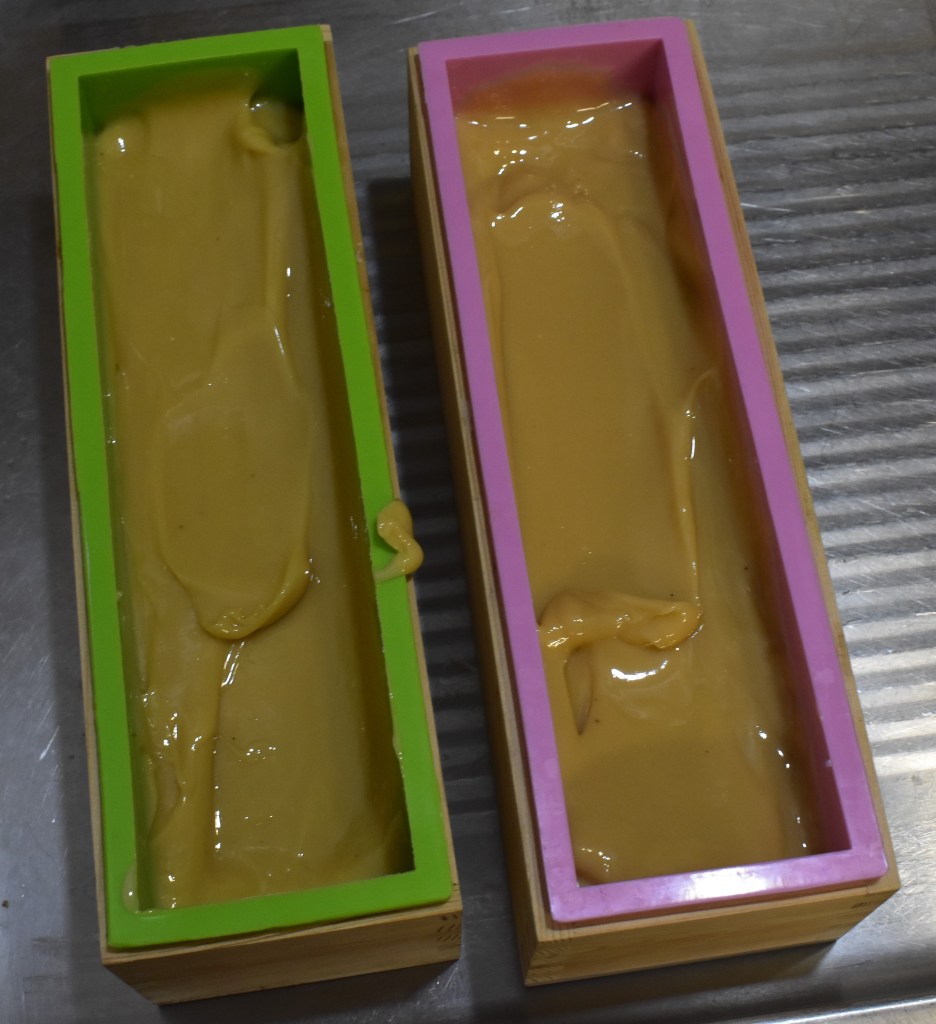
- Once you have reached fifty degrees for both the lye and the oil, carefully pour the oils into the lye and use the stick blender on the highest setting to combine them. If you wish to add scented oils, add them now. The amount of essential oil differs from brand to brand, so you will need to use a bit of trial and error to find the correct amount. However, as I listed in the ingredients section, I found 40ml to be a good amount.
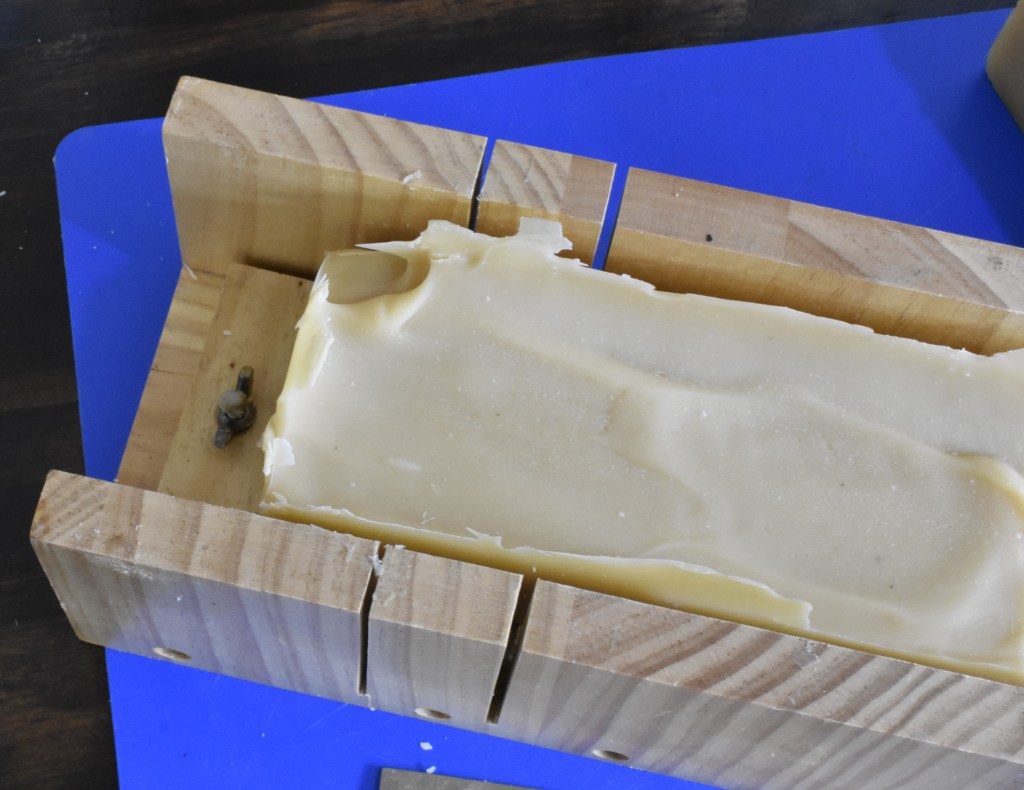
- Keep mixing them until the mixture resembles custard, and like custard. You will know when you are done mixing when you achieve trace. For those that don’t know, you achieve trace when the mixture is thick enough that you can use the mixer to leave swirls or patterns on top of the liquid and not have it settle back in the rest of the mixture. An example of this can be seen in the photo below.

- Once trace is achieved, pour the mixture into the moulds and level it using the spatula.
- Next, you will need to move the moulds to a warm location. A linen cupboard is ideal. But on top of a wardrobe or up high in the pantry is also a great location.
- Place a layer of cardboard on top of the mould to prevent stuff from falling in while the soap starts to cure. Bundle them up with towels, blankets, doonahs or quilts—anything you have on hand. We want them nice and snug so they can slowly cool down over the next 24 hours.
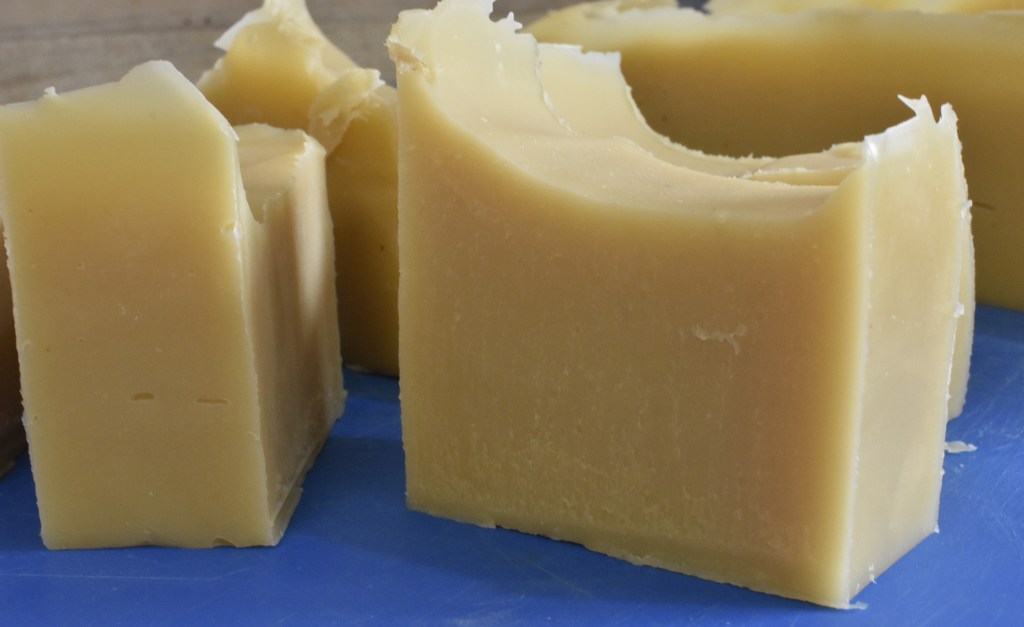
- Once 24 hours have passed, set up a cutting board and grab your knife, remove the block of soap from the mould and cut it into small cakes or bars of soap. The size you choose is entirely up to you.
- Finally, transfer your bars of soap to a cardboard box and sit them back in the linen cupboard or wherever you had them. Your bars of soap will need to be cured before you can use them, and this process will take roughly eight weeks. After eight weeks, they will be safe and ready to use. Enjoy!
As I said earlier, this is a great little recipe I have been using for some time. It is pretty easy to experiment with, especially if you want to play with different scent combinations, and it makes a great place to start before you jump into more complicated recipes that use milk or other ingredients for soap-making.
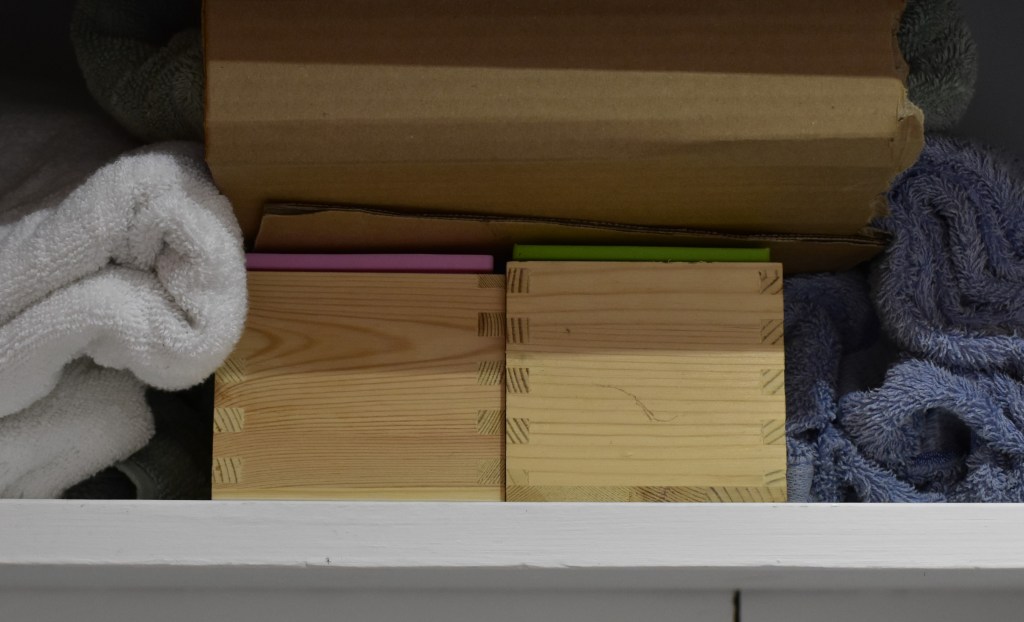
If you enjoyed making your own soap and want to continue, I highly recommend looking online for a set of silicone and timber soap moulds and a timber soap cutter like the ones I use. Although they are not required, they help achieve a more consistent, neat-looking product and are pretty inexpensive.
Another reason I like this recipe is that it allows me to swap out olive oil and use old cooking oil. A 4ltr bottle or drum of olive oil sells for well over sixty dollars here, and that’s not even the extra virgin; that’s just the normal stuff. Spending that kind of money to make soap is out of the question. So, every couple of weeks at work, when I change the fryers, I collect some of the old used oil and bring it home, and after filtering it a few times to remove any of the food scraps, it is good to use.
For those who don’t work in the hospitality industry, try asking your local café, takeaway, or restaurant to see if they would let you have some of their used oil. Most places will have it sitting in drums out the back and will gladly let you take it.
And with that, we come to the end of another post. I hope you got something out of it. If you try this recipe, it would be great to hear what you think of it. Feel free to leave a comment, and if you enjoyed it would be fantastic if you subscribed. Subscribing will allow you to be one of the first to know whenever I make a new post.
Next week, I will return to my regular weekly postings and begin the long process of turning my home into an urban homestead. Quite a bit of research and planning is going into this, and I’m really excited for what’s to come, so it’s sure to be an incredible journey. Be sure to check it out as it happens.
Until then, thanks for dropping in. Until next time, look after yourself. Have a good one, and I will catch you later.

Leave a comment