Hello, and welcome back to the Vandemonian homesteader and the final instalment of my strawberry trilogy. I hope that the past week has been treating you well.
In case you missed it, here are the links to the previous two posts,
Part 1
Part 2
In part one, I gave a brief rundown on the different types of strawberries to help explain what type would suit you best. In the second post, I discussed propagating strawberries, demonstrating how you can take cuttings from an already-established plant as well as grow strawberries from seed.
For the final post of the trilogy, I wanted to share an idea I have seen doing the rounds online on how you can make a strawberry tower. I am in no way taking credit for this idea; plenty of folks online have been doing it for a while now. But I wanted to share it as I believe it will help with my current garden and the next stage of my homesteading goal.
Strawberry towers are a brilliant idea, and I am not just saying that because they are today’s topic. The recommended spacing of a strawberry plant is 30 centimetres apart. And although thirty centimetres may not seem like much for a couple of plants, when you have several, that quickly becomes a large chunk of your garden dedicated just to strawberries. And if you have a small yard or balcony, this idea will be perfect as it maximises your space. Another reason I like this tower idea is because it can be used to grow more than just strawberries. Herbs and lettuce can also grow happily in this tower. So, with multiples of these towers, you can increase the quantity of plants in the space you have available, which means you increase your harvest. Having everything in a tower also means you won’t have to constantly bend over to tend to your plants. Even protecting them with a net is easier as you just have to drape one over the tower, and your plants are protected. I could go on and on about the advantages of these towers, but for both our sakes, I won’t.
Building your strawberry tower
Tools and equipment needed.
- 150mm PVC storm water pipe. The length is up to you. The pipe I used today measured at just over two metres.
- A large pot, the bigger and deeper, the better. I went with the biggest my hardware store had, a 500x390mm plain black pot. The material and style of the pot are up to you, but I went with a standard black plastic pot to help keep costs down.
- Enough soil to fill the pot and tower, I used a mixture of soil from my land, coir brick, potting mix and compost. The quantity needed will depend on your chosen tower’s pot size and height.
- Slow-release fertiliser: you won’t need much, just enough to mix a few handfuls through the potting media.
- A heat gun.
- A large glass bottle, I used and empty “long neck” beer bottle (750ml).
- A saw
- A permanent marker
- Gloves
- tape measure
- sandpaper
- And finally, a can of spray paint. This one is optional, as you may like to paint your PVC pipe before filling it with dirt to add a splash of colour to your garden.
Directions to make tower
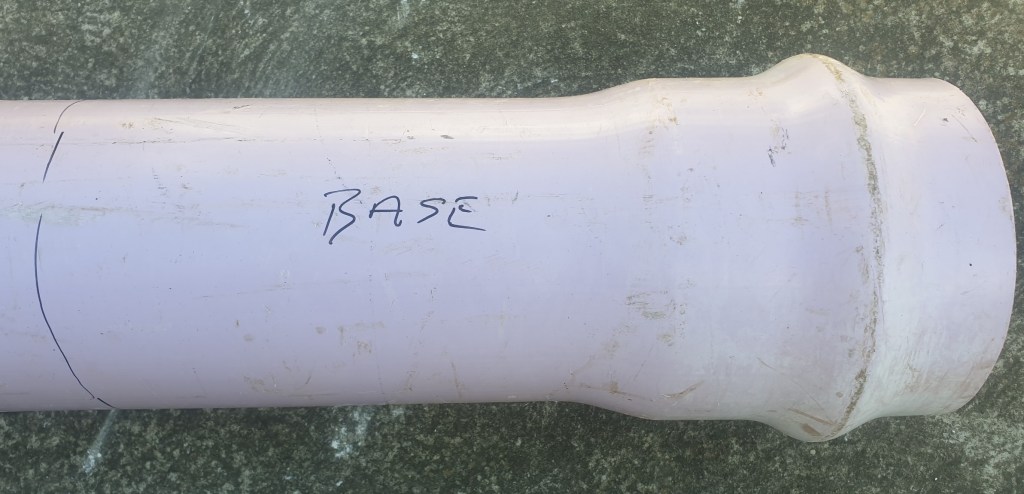
To begin with, stand the PVC pipe upright in the pot and mark out on the pipe where the pot’s rim is. Using your marker, roughly draw a line around the pipe to mark the bottom section that will sit in the pot. This is your baseline. It helps easily identify your pipe’s top and bottom and avoids making any unnecessary holes.
Then, lay your PVC pipe back down on the ground. We will now need to mark where we will cut the pipe to make pockets for the plants. Ultimately, the distance between the pockets is up to you, but I placed them 30cm apart. I measured out four rows of pockets down the sides of my pipe; any more gets a little crowded, and it becomes harder to make the pockets. But if you want to go with two or three rows, that’s an option.
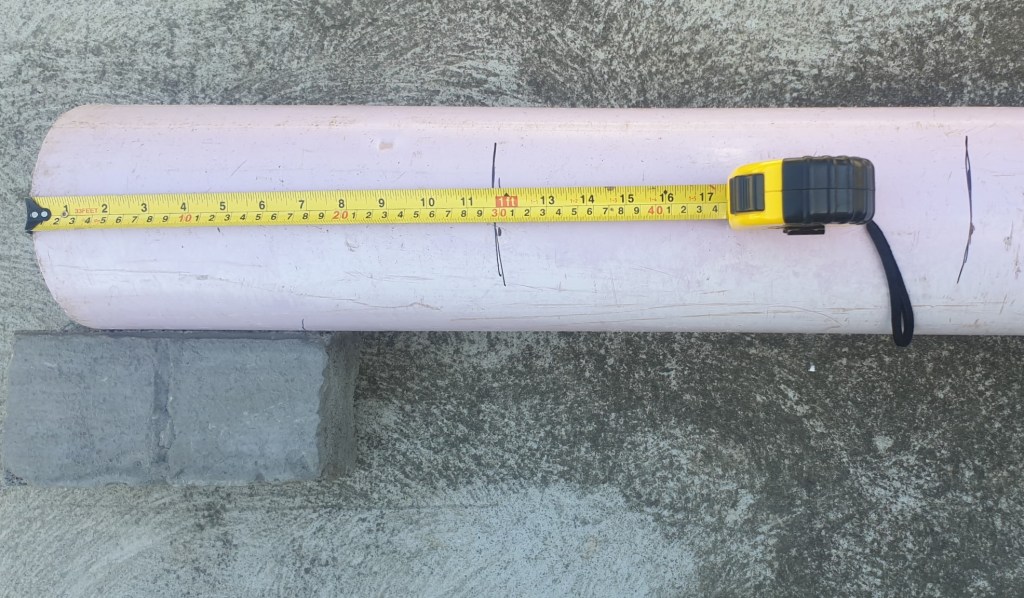
Start by running your tape measure down its length from the top of the pipe and make a mark for every 30cm, stopping when you reach the baseline or line marking the top of the pot. This is your first row.

Roll the pipe over completely so the marks you just made are face down on the ground. And just like you did a minute ago, measure and mark out every 30 cm from the top of the pipe. The marks from your first and second rows should be on the opposite sides of the pipe.
Then, turn your pipe over so the first and second rows you marked are now on the side. Now, you will have to measure 15cm from the top of the pipe for your first mark, and then after that, measure out the rest at 30cm again, stopping at the baseline. This will ensure that the pockets on the opposite sides of the pipe will align with each other but be offset from the next row, giving you more room to make the pockets and preserving the strength of the pipe.
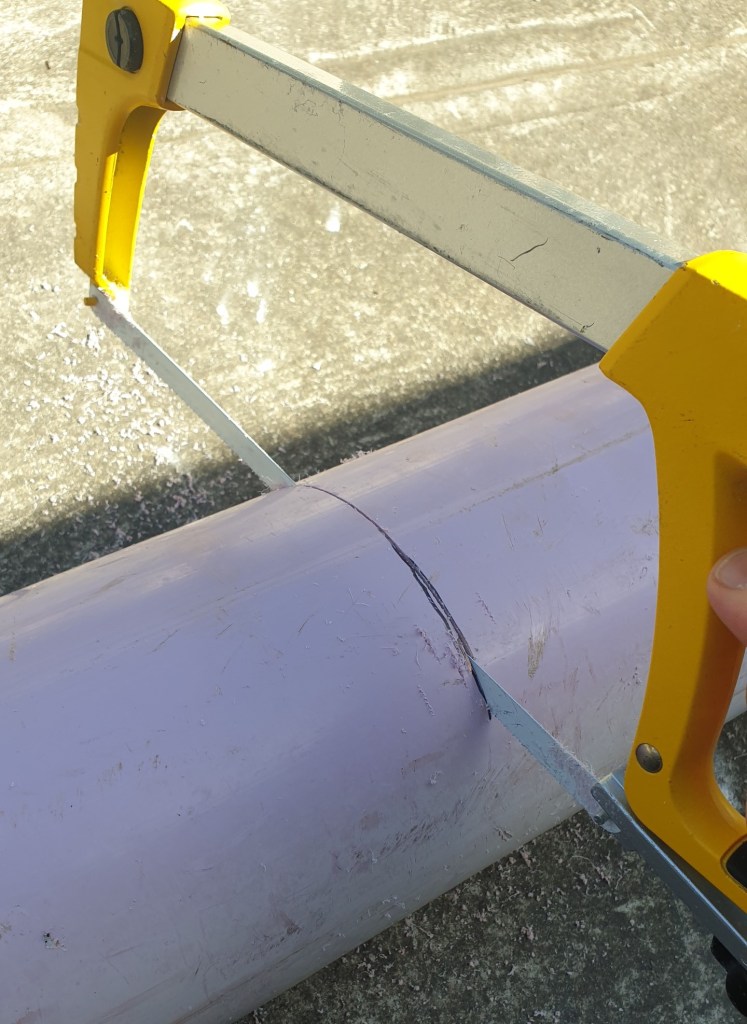
Then, using a saw, cut each mark roughly 10 to 13cm in length. Depending on the bottle you use to shape the pockets, you may need to make the cut shorter or wider. But I’m using 13cm for the long neck, which works well.
I recommend making at least two cuts on opposite sides of the pipe below the baseline during this stage. These will be buried, and because we will reverse these pockets, they will help with stability once the pipe is buried.
Now for the long, tiresome part of the job. Depending on the length of pipe you decide on and the number of pockets you will make, you could be here for a while with this one.
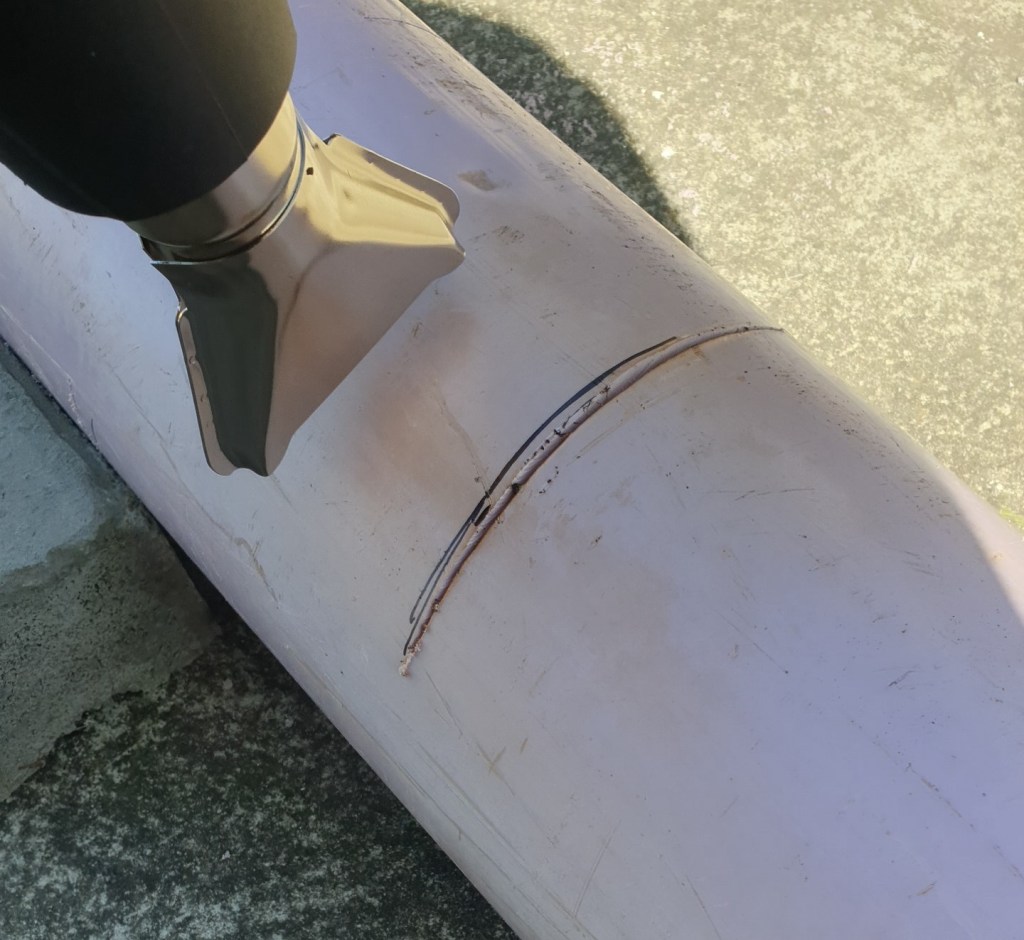
Using the heat gun, apply heat to the pipe around one of the cuts you have made. Take time and gently wave the heat gun over the cut and surrounding area. Try not to focus the heat too long in one area as this can result in the pipe burning. The pipe may also experience a bit of discolouration as it heats up. This is normal; if you don’t like it, you can always paint over it later. You may also need gloves for this stage as the glass bottle and pipe can get a bit hot, and the PVC pipe may have rough edges. While talking about safety, I recommend doing this stage outside or in a well-ventilated area. You will be spending a while applying heat to plastic, which results in the kind of fumes you don’t want to breathe in.

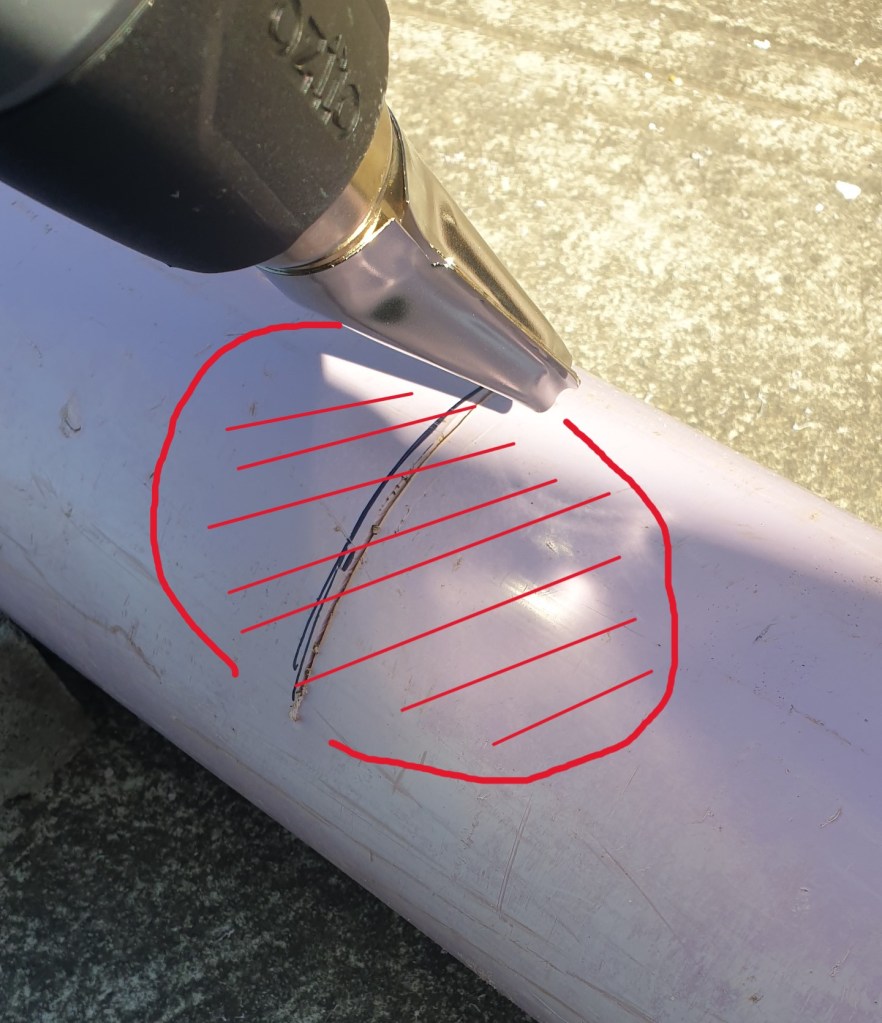
Using the glass bottle, poke the top side of the cut. If it is soft and flexible, like a sheet of thick rubber, then you are good to go; otherwise, keep working it with the heat gun. Once it is ready, push the neck of the bottler into the cut you have made. Making sure as you do so, the bottom side of the cut is being forced out to form a little pocket while the top half is pushed by the glass bottle inside the pipe.
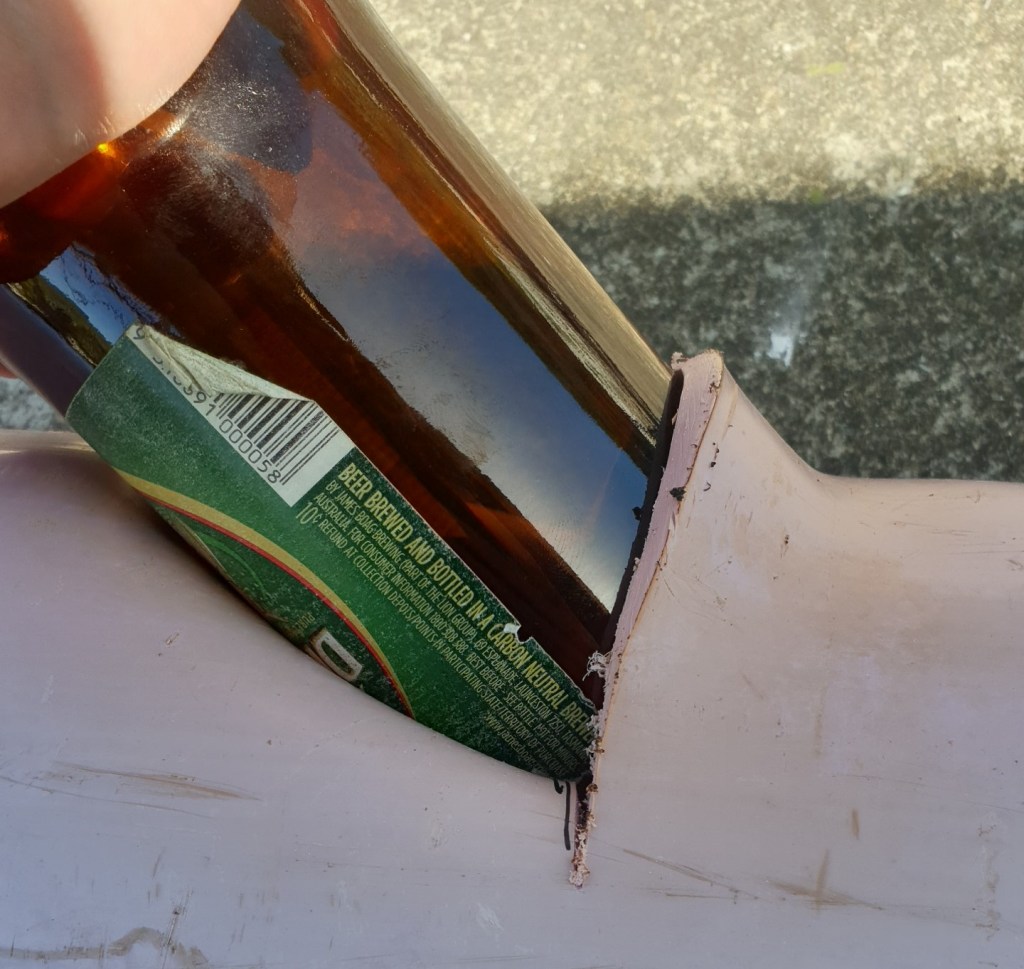

You should be able to slide the bottle in up to its thickest part, let it sit for a couple of minutes, and give it a wiggle every now and then to stop the pipe from sealing around it too tightly. When it has cooled, pull out the bottle and repeat this process for every cut you have made on the pipe.

When it comes time to heat up and mould the cuts you made below the baseline, insert the bottle in the opposite direction, turning those pockets upside down when compared to the others.
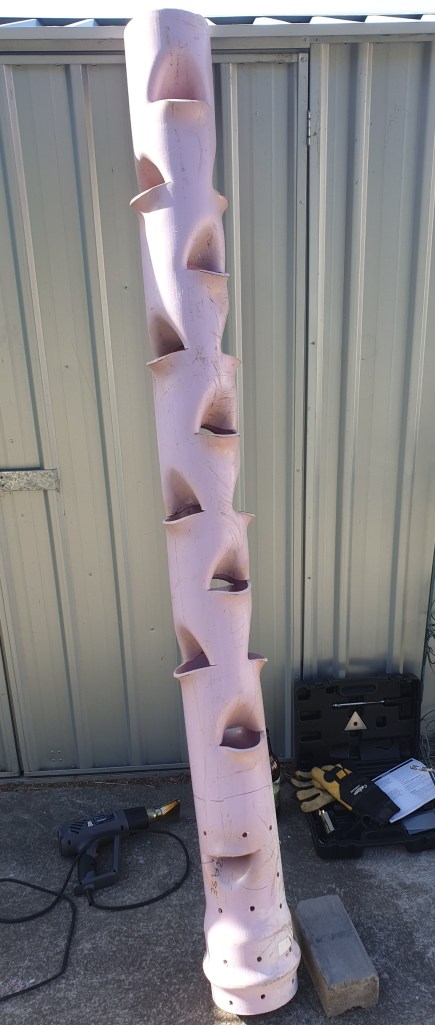
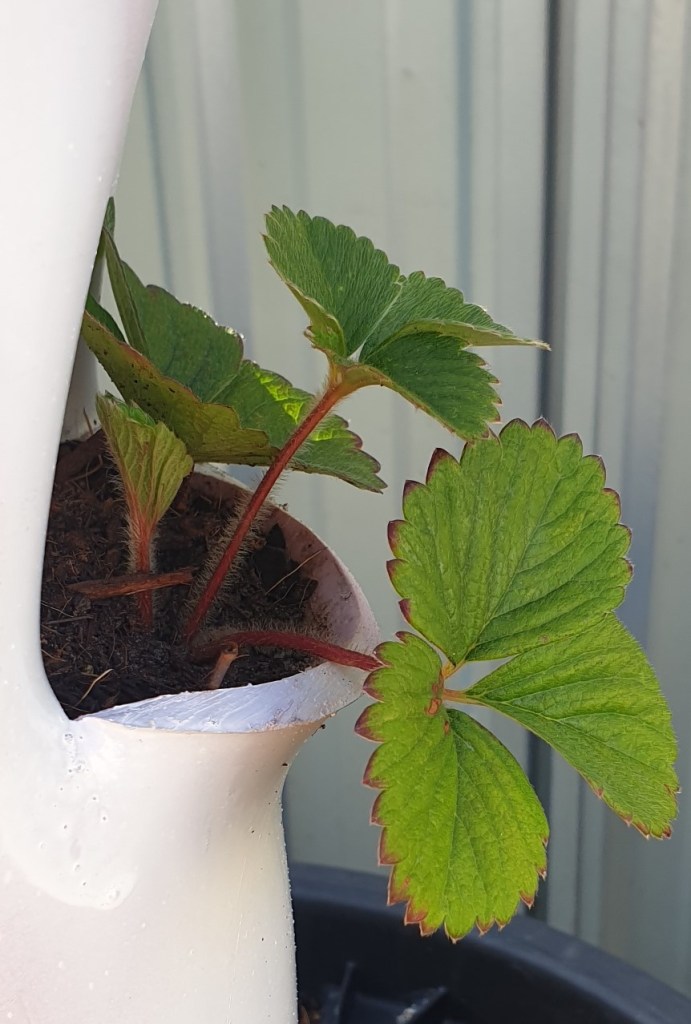
Then, when the final pocket has been moulded, you should end up with something that looks a little like this. You may notice in the picture that I went and drilled quite a few holes in the lower part of the pipe. This is to help drainage and is entirely up to you.
Next, get your sandpaper and give all the edges of the pockets you just made a quick sand. This removes any rough edges, making it safer to stick your fingers inside. It also makes it look a little neater, which is always a plus.
Once the edges have been sanded, wash the pipe and hose it down, ensuring all the shavings are removed. Allow it to dry, and if you want to paint it at this stage, go for it. I decided to leave mine as is.
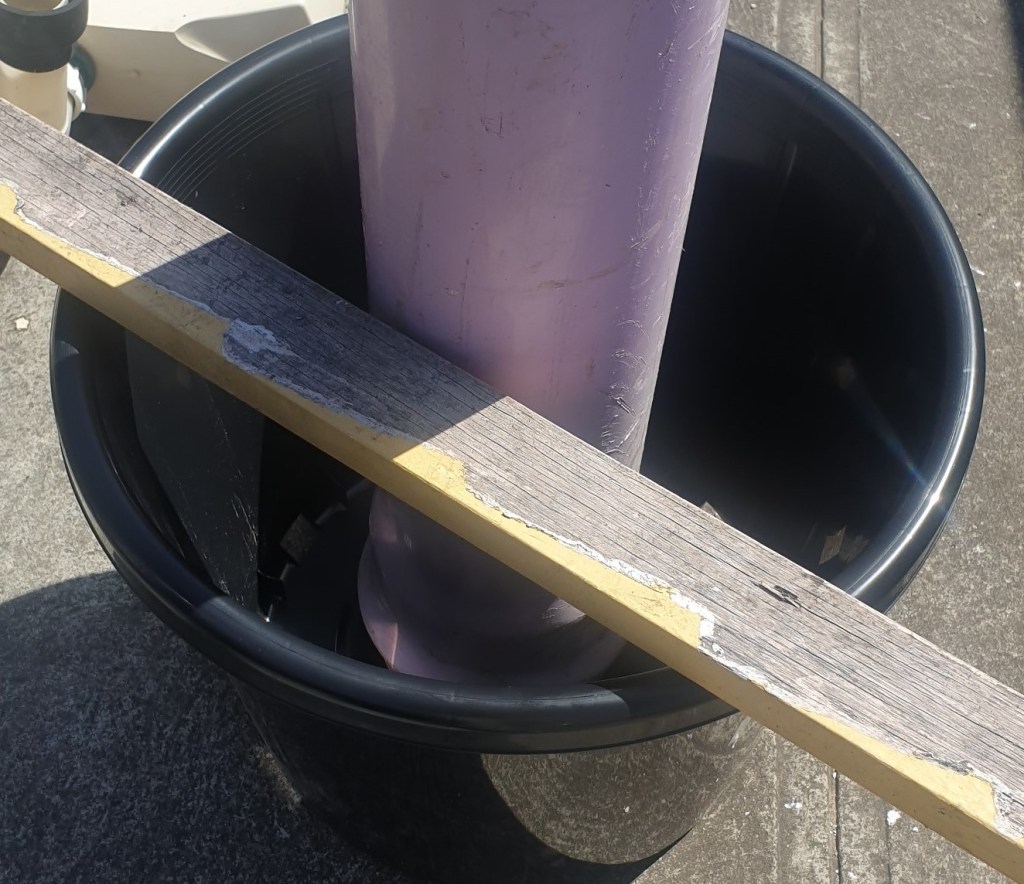
Once the pipe is dry, stand it back up in the pot and begin filling the pot with soil. Ensure you pat it down well to help compact it around the base of the pipe. Once the pot is full, start filling the pipe. I used my trowel and stuffed the potting mix in through the pockets of the pipe, working from the base up. Repeat this until you have filled the pipe all the way up to the top pockets.
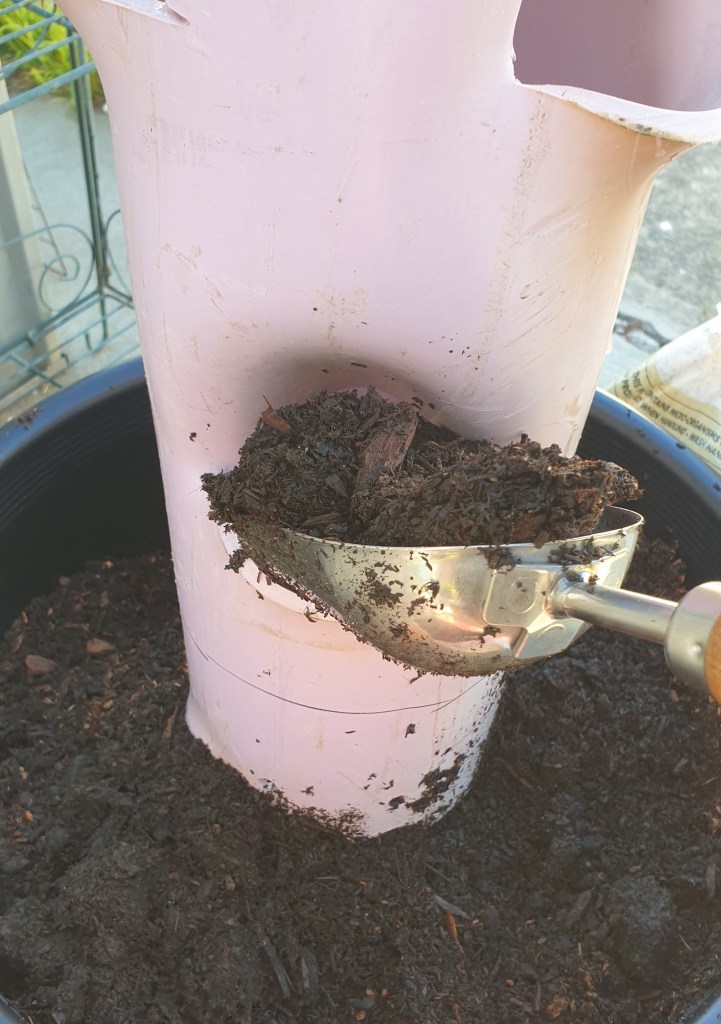
Then give it all a good soak, and I mean drench it, paying particular attention to the soil inside the pipe. This will help everything settle and go where it needs to.
Then transfer your strawberries, sow some seeds, or plant whatever you like in there. At this point, you have completed and can use your new garden tower as you see fit. You can also put plants in the pot around the base of the pipe.
I plan to plant the cuttings from last week’s post in mine and because they are not ready yet. I haven’t filled my pipe completely. I will add more soil as the cuttings are ready and then move them all in.
This is my second strawberry tower, as I made one a little under two months ago, and I will be continually taking cuttings from my mother plant until both are full. One of these towers can hold up to twenty-one strawberry plants, eighteen in the pockets on the tower and another three around the base. That’s forty-two strawberry plants in these two towers alone, and the best part is they take up next to no space in my backyard. So you can see why I said before that these towers are great for making the most out of the smallest space.

One final tip
Now, if you’re anything like me and you see this idea online, love it and decide to run out and try it for yourself. Only to be stopped when you see the price of new PVC pipe. I have a final piece of advice for you.
My local hardware store priced 150mm PVC pipe at fifty-two dollars a metre. That would mean I would have to spend over two hundred dollars to make the two towers I have now. I didn’t want to spend that much on pipe just to cut it up and mould it, so I looked elsewhere. The salvage yard at my local tip shop had 150mm PVC pipes going for eight dollars a metre. They were old and a bit rough around the edges, but they were still fine for what I needed. As an extra bonus, the guy at the salvage yard knocked a bit of the price off, so in the end, I walked away with four meters of pipe that only cost me twenty dollars. So, as I keep saying, shop around before you buy. More often than not, you can find a cheaper used item that will do the same thing as the one you are looking at buying firsthand.
Now I hear you ask, why does anyone need that many strawberry plants? And that’s a perfectly reasonable question. And that question brings me to my next point.
Growing berries.
In a previous post, I discussed the approaching end of summer and how I use this time for reflection. That post can be found here if you’re interested.
I mentioned how I would be in this house longer than planned. And because of this, I decided to take the next step in my homesteading journey and look into urban homesteading right here while I wait to move out onto my land. Thinking about the experiences and challenges with my garden over the past summer, I thought about what I could grow or make at home to help with the next stage of my goals.
In the post, I talked about how I planned to grow crops to sell at my local markets, but since then, I have spent a while visiting the local markets, studying the stalls to see what was being sold, how much was being sold, the prices and which stalls sold out by the end of the day compared to those that didnt. Selling fruit and vegetables wouldn’t cut it. Too many people were doing it, and the stalls that did sell just fruit and veg were generally the ones that didn’t sell out. So, I had to change that idea.
You can probably guess where this is going by now, but in the end, I have decided to grow strawberries and make some good old-fashioned jams. Out of all the markets I visited, not one of them had a jam or berry stall. That’s not to say people were selling weren’t selling berries. They most definitely were, but outside of the standard punnets of berries. There was nothing else.
I also don’t plan on sticking with just straight strawberry jam. As other produce from my garden becomes available, I will mix it to create different jams and sauces. Whatever I make will be made with homegrown ingredients using simple old-fashioned recipes, cutting out all the additives and preservatives that today’s jams and sauces are packed with.
I have since been reading up on the local council and government requirements for starting such an idea and finding and reading old cookbooks from a time when homemade jams were the norm. My background as a chef will also come into play as I am already qualified and experienced with my local state and council’s food safety requirements.
In the meantime, while I continue to read government requirements, trail various recipes, and eventually apply for permits for this business. I will make a few more strawberry towers to house the strawberries I am growing from seed. And if all goes according to plan, I can start producing and selling my homemade jams and sauces by next summer. Another positive to this idea is that as I do this, I will still be able to maintain my current nine-to-five, so I won’t miss out on any income while I get the business up off the ground.
And this is the reason why I have talked about strawberries for the last three posts. Essentially, I will turn my backyard into a mini berry farm where I will sell not only the produce I grow but also jams, sauces, and potentially any excess berry seedlings and plants. But until then, I have enjoyed this trilogy and learned a lot as I researched it, and I hope you, the reader, have gotten something out of it as well. With that all said and done, we come to the end of another post. Thanks again for dropping in. If you enjoyed this post, feel free to like it or subscribe so you can be notified whenever I make a future post.
Until next time, thanks again, have a good week, and I will catch you later.

Leave a comment