G’day, and welcome back to the Vandemonian homesteader! I hope you’ve been doing well this past week. As for me, I’ve been diving headfirst into 2024. The holidays are over, the visiting family has gone back home, and I’ve finally recovered from that short bout of flu. Right now, I’m keeping busy harvesting from my garden and getting back to work on my renovations. Since it’s late summer here in southern Tasmania, I’m also starting to look back on the past spring and summer, thinking about what I could have done differently, and considering how to apply those thoughts to the upcoming seasons. But I’ll talk more about that later on.
About a week or so ago, while looking through the fridge, I found a pair of wombok or nappa cabbages that I had forgotten about in the back of the vegetable crisper. I hadn’t grown them. I had picked them up from the supermarket when they were on sale. Realising they needed to be used and that there was no way I could eat that much cabbage, I thought I would make some kimchi to preserve them.
So, with that plan in mind, I pulled my cookbooks from storage. As anyone who has been a chef for any length of time would know, a side effect of the job is amassing a ridiculous amount of cookbooks and notepads filled with hastily scribbled recipes. After a few nights of flipping through my collection, I found a recipe I thought was worth trying.
Most kimchi recipes require fish sauce, shrimp paste, and gochugaru or Korean red pepper flakes. My recipe today uses none of these. I wanted to find a workaround as I didn’t want to spend all day driving around town looking through all the specialty spice shops for something I would only use once. So, the recipe isn’t a hundred per cent authentically Korean, but it still works and is well worth a try. Also, this recipe is entirely vegan and vegetarian friendly by not using the fish sauce of shrimp paste!
Making Kimchi
Making kimchi is a process that’s divided into three stages
1. brining
2. making and mixing the sauce
3. fermentation
Temperature is also a factor to be considered when you start making it. You will need to keep the kimchi warm during fermentation, and then it will have to be stored in the fridge as it is not shelf-stable. With that said, let’s crack on.
Ingredients
The brine
- 1 large head of cabbage
- 1 cup of coarse sea salt
- 3.5 litres of water
- .5 cup of sea salt for sprinkling
Kimchi sauce
- 2 cup water
- ¼ cup of rice flour
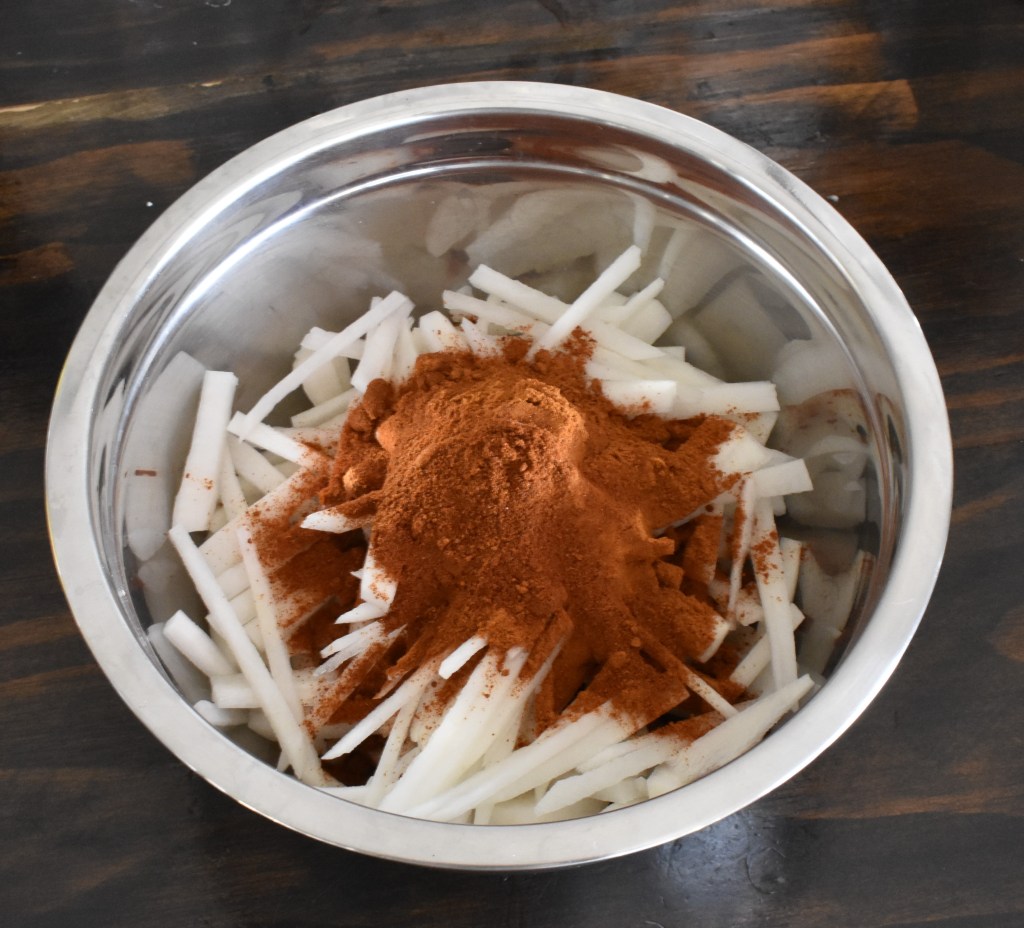
- 400g daikon radish, peeled and julienned
- 1 cup deseeded rough cut chillis
- ¼ cup dried chilli flakes
- ¼ cup cayenne pepper powder
- 1 cup rough-cut red delicious apple
- ½ cup rough cut granny smith apple
- 1/3 cut rough-cut ginger
- 2 tbsp salt
- 1tblsp sugar
Method
Part 1: Brining the cabbage
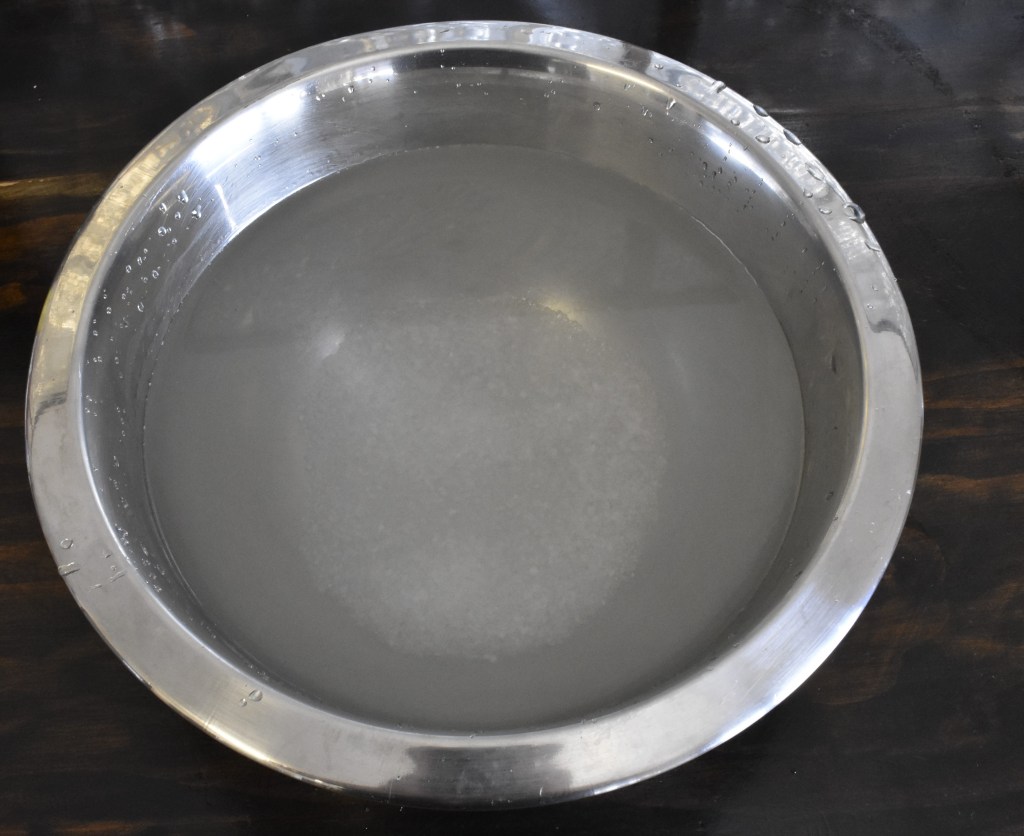
- Mix 1 cup of coarse sea salt with the 3.5 litres of water.
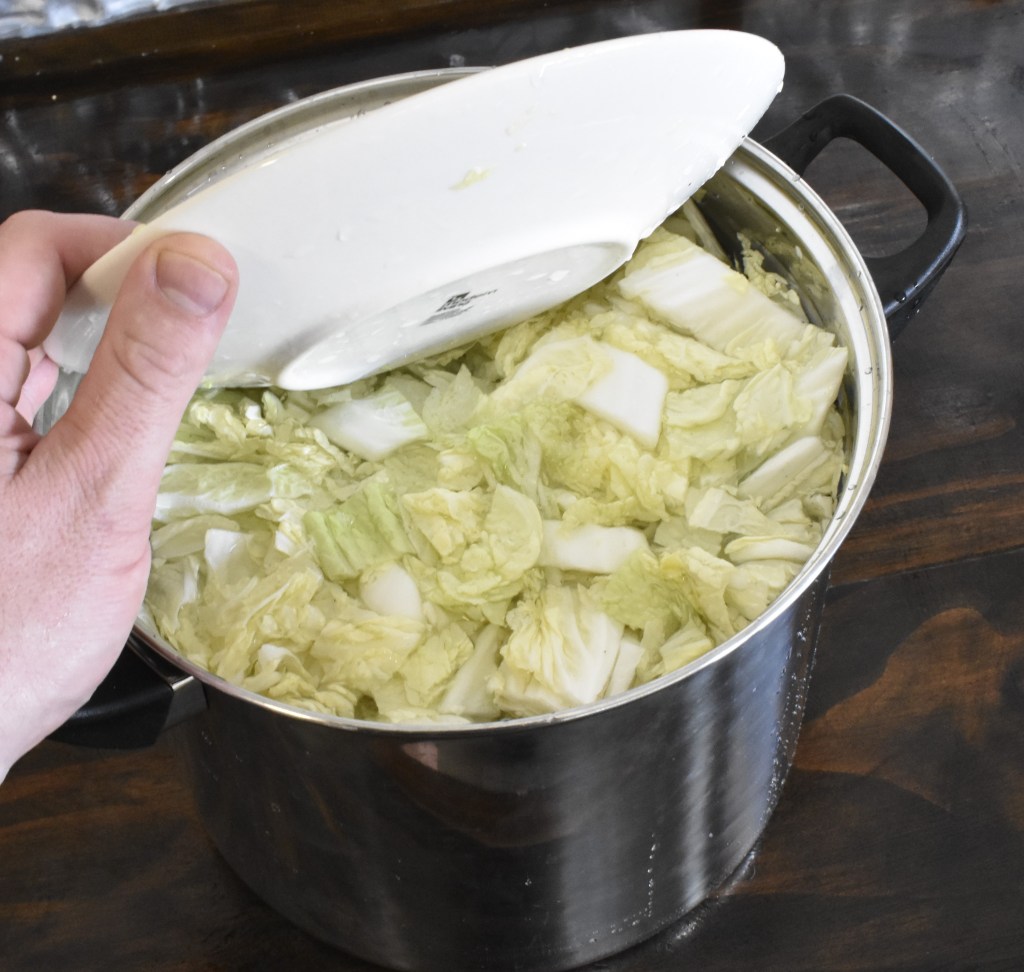
- Cut the cabbage in half and then into quarters lengthwise. Remove the core and cut the remaining cabbage quarters into roughly 4cm pieces.
- Layer the thicker bits into a large bowl or pot and sprinkle a bit of the .5 cup of sea salt over the leaves. Repeat this until all the thicker leaves are layered. Repeat this process with the thinner leaves until all the cabbage has been layered.
- Pour the brine over the layered cabbage and add any remaining coarse sea salt.
- Set the bowl aside out of direct sunlight for four hours until the thicker parts of the cabbage are soft but retain some of their crunch. You may need to sit a bowl or plate on top of the cabbage to keep it submerged during this time.
Part 2: Making the kimchi sauce
- Mix the 2 cups of water and rice flour in a small pot until well combined.
- Heat the flour and water mix over medium heat, whisking continuously until it turns into a thick paste. Remove from the heat and allow to cool completely.
- Place the apples, ginger, salt, sugar, deseeded chillies, and the cooled rice paste in a food processor or blender. Process until smooth.
- Place the daikon, chilli flakes and cayenne pepper into a bowl.
- Pour the pureed apple mix over the daikon and chillis, and mix it well until the daikon is coated and the spice is mixed through thoroughly.
Part 3: Fermentation

- Drain and wash the brine off the wombok. You will need to clean it thoroughly to remove any excess salt. Place the washed and drained cabbage into a fresh bowl.
- Pour the kimchi sauce over the cabbage and mix them well. I recommend using your hands for this stage to work the sauce through the cabbage properly. However, be careful as you are touching cut chillies with your hands. Make sure to wash your hands afterwards, especially before touching your eyes, nose or other sensitive body parts.
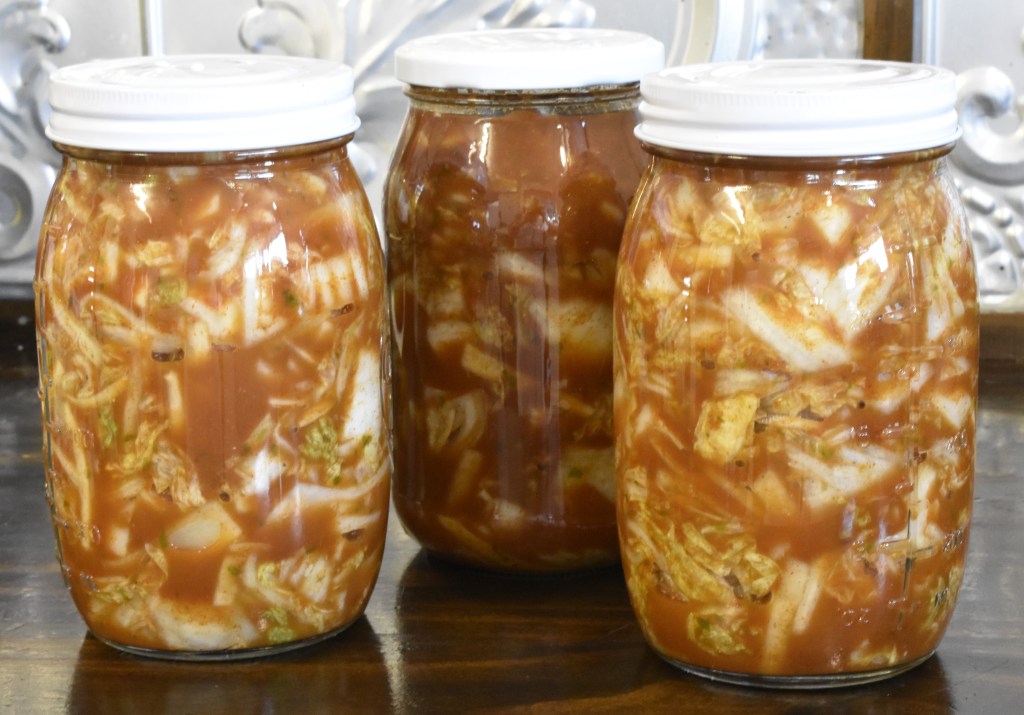
- Transfer the cabbage to a clean, sterile, air-tight container. I used some mason jars that I had boiled and allowed to air dry. When you are filling your jars, don’t fill them all the way. Make sure to leave roughly 2cm of space at the top of the jar. You will also want to ensure the kimchi sauce covers the cabbage, which helps with the preservation.
- Set the jars aside in a cool, dry place out of direct sunlight. Allow them to sit at room temp for three days. The fermentation time will be different depending on the weather and heat. As I made mine in the middle of summer, I left them for two days instead of the entire three.
- Once the three days are up, transfer the kimchi to your fridge.
As I mentioned before, kimchi isn’t shelf-stable, so you won’t be able to keep it hidden in the back of your pantry like other preserves. Upon hearing that I was making kimchi, a Korean friend excitedly told me about her experiences making it back home with her family, and one of the things she mentioned was that it was common for families to have a small bar fridge that they use specifically for storing kimchi.
Another point worth mentioning is that although you are preserving your wombok cabbage, it won’t last forever. Your jar of kimchi may still expire. The cooler temperatures of the fridge help to extend its shelf life, but as you use it, you will need to check before each use just in case the jar has expired. Some things to look for in expired kimchi are the colour, smell, and texture. If your kimchi is discoloured and turned brown, black or pink instead of the normal vibrant red, this is a good indicator that it may be unsafe. A strong offensive smell or a smell of alcohol is another indicator. Also, if it has turned slimy and mushy, chances are it has turned and is no longer safe to eat and should be discarded. As with any form of preservation, you need to be mindful that food still expires and may contain harmful bacteria, so when eating food you have preserved at home, go with your gut feeling. If it doesn’t seem right, don’t eat it.
But having said that, don’t let it stop you from trying. Preserving food can be fun and can add some great twists to an already-loved food.
And there you have it, Homemade vegan kimchi. It’s a lengthy recipe, but I hope you try it as it is delicious. It makes a great side dish, or if you are up for trying something different, I have been marinating mushrooms in an XO sauce and having mushroom and kimchi burgers. It’s definitely a new favourite of mine.
Next week, I will discuss the summer that was, what I felt worked in my garden, what didn’t and what I will do differently next year. I will also give an update on my progress as I continue to work towards moving to my land. Until then, thanks for joining me. Have yourself another great week, and I will catch you next time.

Leave a comment