Hello, and welcome back to the Vandemonian homesteader. I hope you’ve had yourself another fantastic week and are doing well. It’s been another busy week for me, but that’s how I like it.
Since my last post, I’ve started feeding my worm farm, and I’ve been able to collect my first batch of worm juice, which I quickly divided amongst my pot plants. Outside of the usual routine of work, housework and renovations, I have also been busy in the garden. As with any garden, there are the everyday day-to-day jobs: weeding, watering and mowing what’s left of the lawn. And I am happy to report that all that hard work has paid off. The few plants the possum didn’t eat are now ready to harvest, and that’s what I want to talk about today.
For the past week and a bit, I’ve been picking the peas, beans and kale from the garden as I need them; the tomatoes, Brussels sprouts, corn, and pumpkin are still not ready. But one of the plants that is ready has well and truly outperformed everything else, and that is the silverbeet. The seeds I planted a few months ago have grown and are ready to harvest. And to my surprise, a few seeds that must have been dormant in the soil from when I used to live here years ago started growing and are now doing better than the silverbeet I planted in spring. As a bonus, it turns out my resident possum has no interest in silverbeet, so they are one of the few plants I have grown that he hasn’t destroyed. With all these factors combined, I have a decent harvest of silverbeet right now, more than I could use in one sitting. So, this is why I thought I would share with you how to blanch and freeze your produce.
To blanch or not to blanch?
It’s a good question; why go to the trouble of boiling water and getting so much ice when you could just toss your veg in the freezer?
Blanching has a few benefits and is a great way to prepare your produce to be frozen. The sudden dip in boiling water is excellent for removing any surface bacteria and dirt that may be present. It is also a great way to prevent your veg from deteriorating in the freezer. When you freeze your vegetables straight from the garden, the enzymes that cause them to break down don’t stop when frozen. So even though the vegetables are frozen hard, the enzymes that cause them to decay are still slowly at work. Blanching them helps to stop this process, locks in the nutrients of your vegetables, and helps them retain their texture once they are thawed.
Blanching can be done on most vegetables. However, an essential thing to remember is that the larger the item you are blanching, the longer it will need to sit in boiling water. This runs the risk of cooking your vegetables instead of blanching them. So, larger items like carrots, broccoli, and cauliflower must be cut into smaller pieces.
How to blanch leafy greens
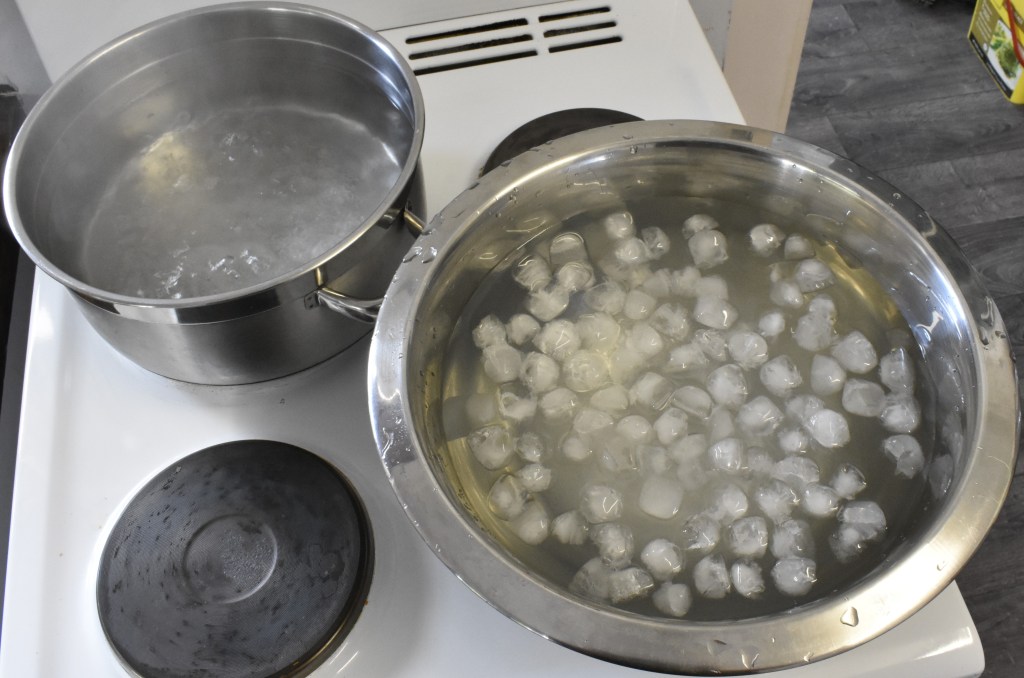
Set a large pot of salted water to boil.
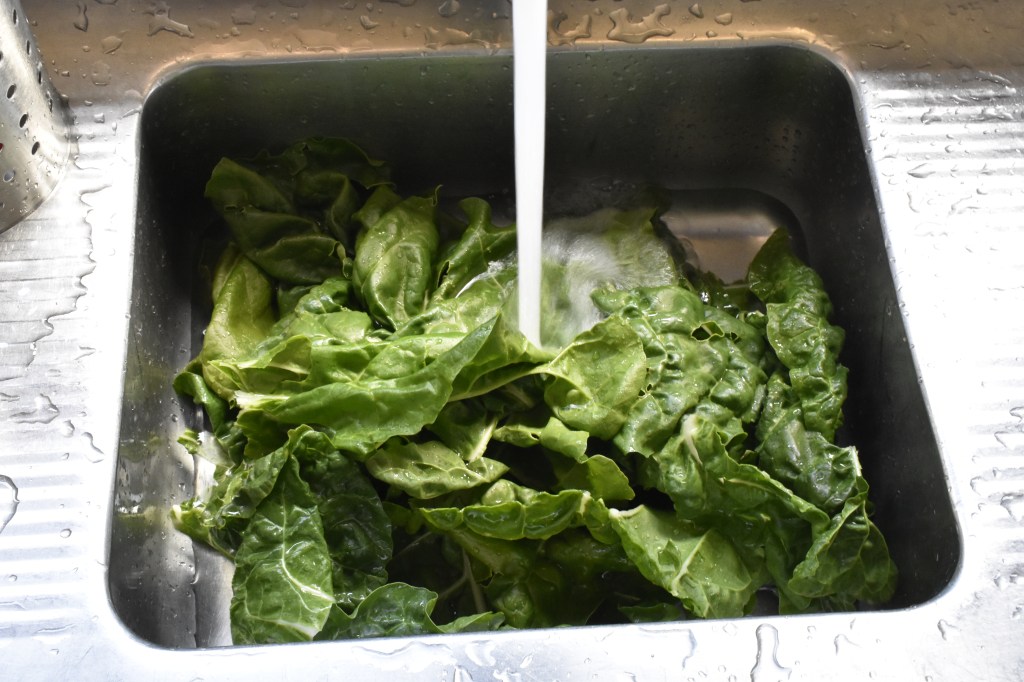

While you wait for it to boil, trim and wash the veg you want to blanch. If you need to, now is the time to cut it smaller. But keep in mind that the smaller it is, the less time it takes to blanch and the greater the risk of overcooking your greens.
Fill a large bowl with cold water and ice. Allow it to sit for a minute, and keep it close to the pot of boiling water. Less movement saves time.
You may need to spend a few days making ice in your freezer to prepare for this. I saved up a couple of days worth of ice and kept a few bottles of water in the fridge. When combined, The water and ice will create an ice bath that is just as important as the boiling water. We are stopping the cooking process by taking the veg that is being blanched from the boiling water and immersing it quickly into the ice bath. If we lay it on the bench or just put it in the fridge, it would still cook itself and deteriorate in quality. We want to stop that.
Once your pot of water is boiling, and I mean boiling, we want big bubbles on that thing, you can begin.

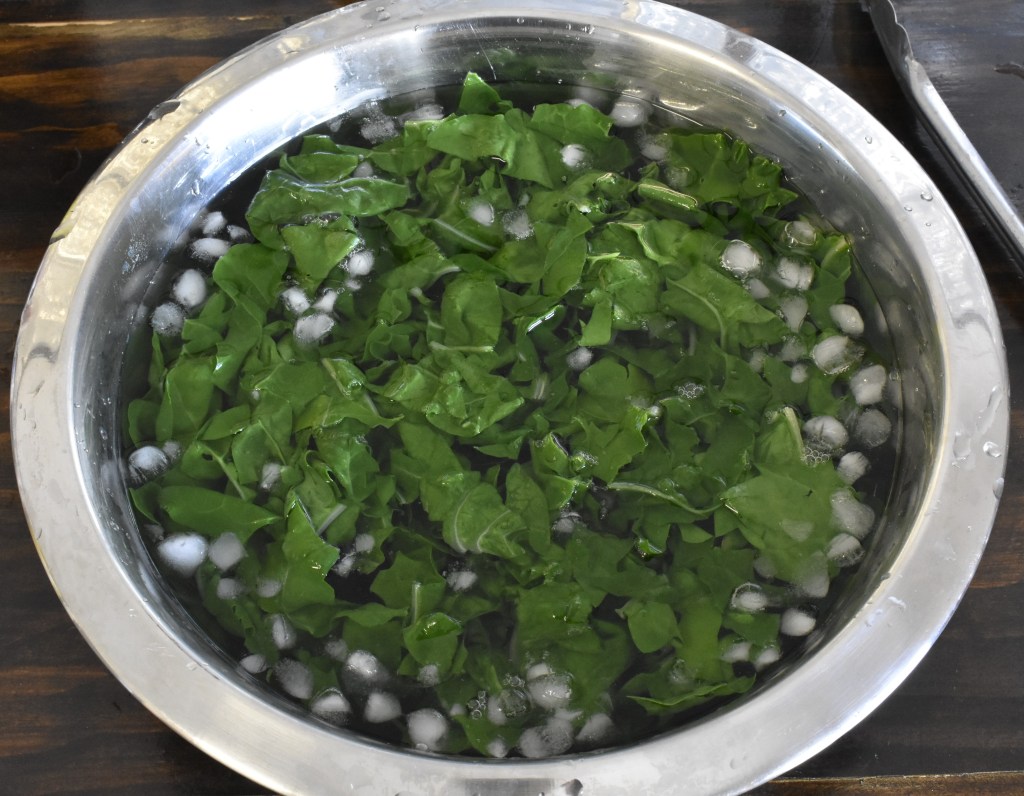
Take the green or veg you wish to blanch and add it to the pot of boiling water. For something like my silverbeet, I only need to dip it in before transferring it to the ice bath. It doesn’t take long at all. All you need to do now is to dunk the greens into the boiling water. Once your vegetables are in the ice bath, stir them, ensuring they are submerged. Allow them to sit for a while so they can cool properly.
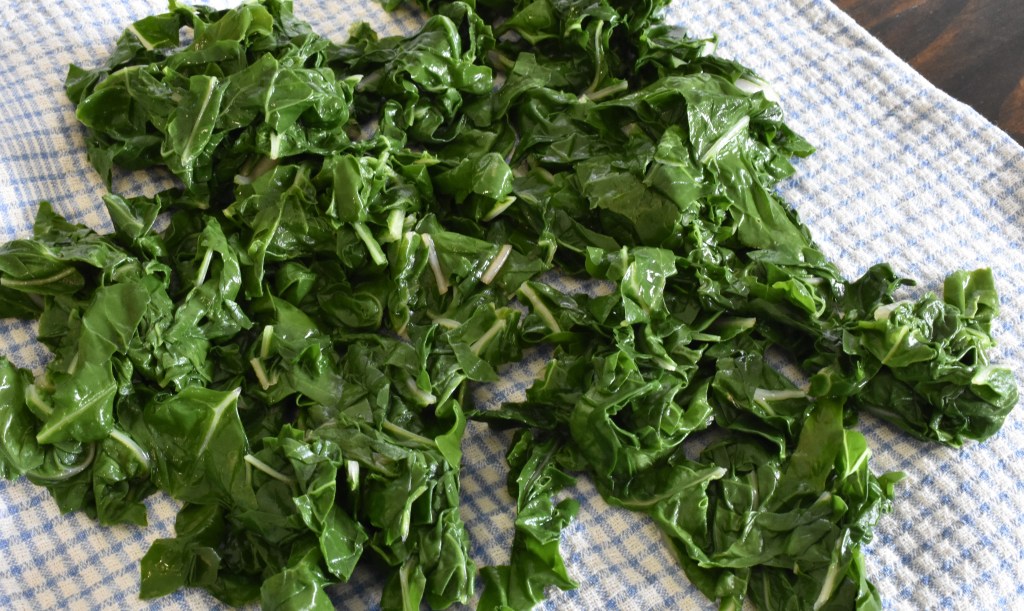
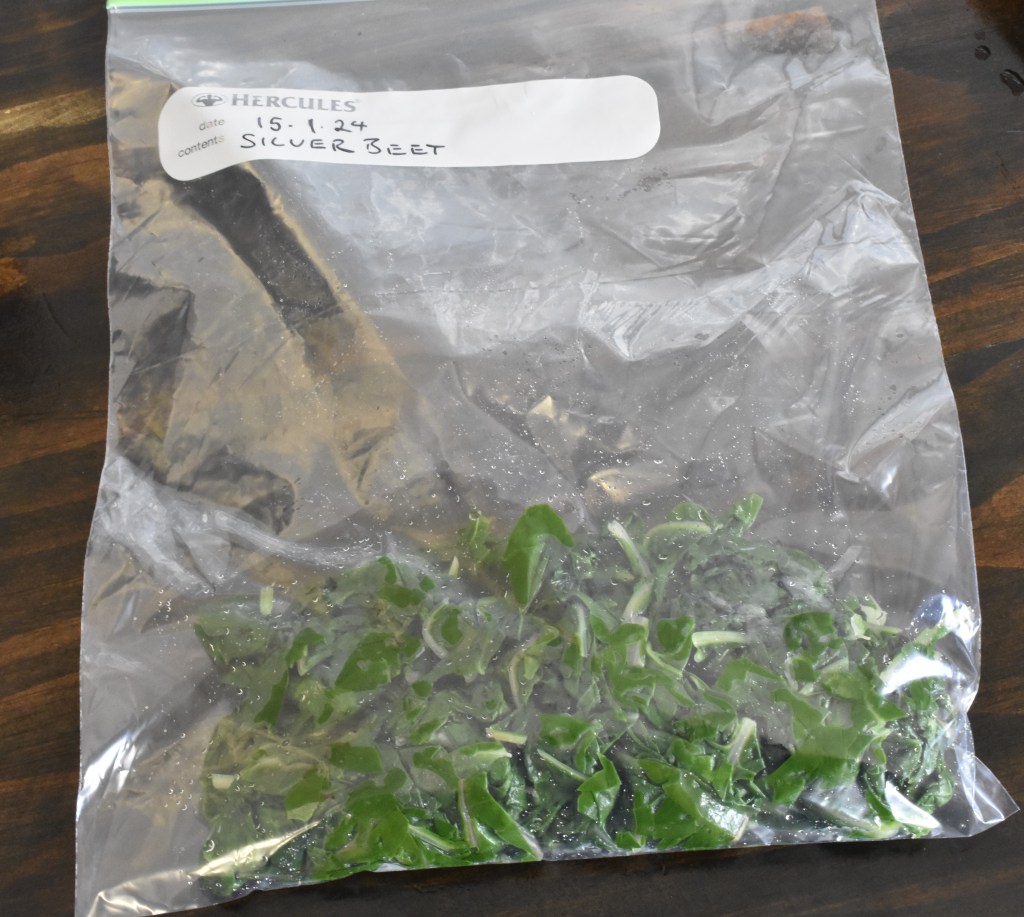
When cooled, strain the vegetables from the ice bath, squeeze out any excess water, and lay them on a clean dish towel or paper towel. Gently pat down the top using another towel or piece of paper towel. When dry, collect and place them into a zip lock freezer bag or container. At this point, I recommend you label the container or bag with what it contains and the date you froze it.
And there you have it, Blanched Vegetables, or in my case, silverbeet. This works well as a great and easy way to preserve the veg from your garden. But it is also helpful for when there is a sale at your local supermarket or grocery store. When the prices are good, you can buy more than you would normaly use, blanch and freeze it, saving it for later without worrying about it rotting at the bottom of your fridge.
Next week, I will return to the kitchen as I turn my old eggshells into a great, garden-friendly snail and slug deterrent. So until then, thanks for dropping by, and until next time, have yourself a good one, and I will catch you later.

Leave a comment