Hello, and welcome back to the Vandemonian homesteader. I hope that the past month has treated you well and that you are making the most of life and having fun regardless of where you may be.
As for me, here in Tassie. Things have been busy. As you no doubt know, I haven’t been able to sit down and post for a while. With my savings were dwindling, and I had to find a job fast. Surprisingly it took much longer to find work I had initially thought. My original plan was to send a few job applications every few days as I returned to the state. That way, I would have time to work on the needed renovations, sort myself out, and get set up again. But after a couple of weeks, I had to change tactics, throwing everything at jobhunting and putting life on hold. Thankfully, that has paid off, and now I have a great job with a brilliant work-life balance that will allow me to shift my focus back onto my renovations, the land and this blog.
However, I managed to find time to work in the garden during all that frantic job hunting. And a lot has changed since my last post. I will go into more detail about the challenges the garden, and I have had to face later on. But for now, I would like to bring you the long overdue post on alternative containers you can use to grow seeds.
It’s easy to think or want to give your plants the best start in life by going out and purchasing the best seed-raising mix, pots, flats or gadgets you can find. Nobody can blame you for that. We all want the best for what we grow. Otherwise, we wouldn’t be growing it. And if that’s what you want to do, go for it, you do you. Everybody you talk to will have their own way of doing things, methods that have worked for them repeatedly. Ultimately, you need to find what approach you like best. You won’t achieve that until you’ve tried a few different methods. Because of this, I thought that today, I would share a few techniques that you could use to start your seeds using random items found around your home, Objects that would typically be considered rubbish. This way, you don’t need to run out and spend a fortune raising a couple of seeds, and as an added bonus, you help reduce your household waste.
Egg Cartons

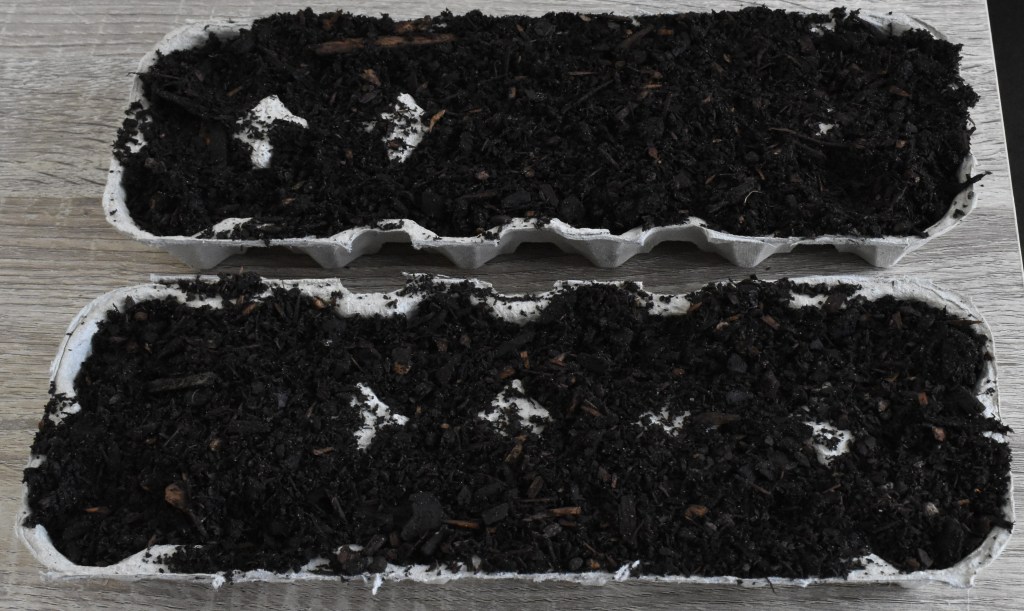
To begin with, I will start with my favourite method of germinating seeds: cardboard egg cartons. I don’t recommend the plastic or styrofoam cartons, as they won’t break down into the soil.
I enjoy eating eggs just as much as the next man, and because of this, I always have a couple of egg cartons on hand. But when I want to sow large amounts of seeds, I have the advantage of being a chef and working in the hospitality industry. This allows me to get egg flats from work. An egg flat is just a large egg carton that holds roughly thirty eggs, so with a bit of potting mix or seed-raising media in each of the pockets, you can get a good start on all your planting needs.
Once I have saved enough cartons, I fill them with a seed-raising mix and place them onto a tray or container to ensure they don’t leak water all over the bench. I then add the seeds and give everything a good soak and place them somewhere sunny and warm.
As I mentioned earlier, I like using egg cartons because the seeds are in separate pockets, which makes transplanting them easier. By the time the seeds have sprouted and are ready to be moved on, all you need to do is tear the pocket containing the seedling off from the main carton and plant it in either the ground or pot. Since the egg cartons have been filled with soil and absorbing water, they will be very soft and mushy when the seeds are ready to be transferred. The soft cardboard also has the benefit of not restricting the root’s growth; if it wants to, it will grow right through the cardboard.
However, like any other seed-raising method, there is always the risk of mould, and mould does love soggy cardboard. You can avoid this by not overwatering your plants and ensuring they are kept in a sunny, well-ventilated space. This will allow the soil time to dry out properly between watering.
Egg Shells
There are countless photos and videos online, and I am sure you have seen them around as well. Pictures on social media of a dozen or so eggs lined in their cartons with seedlings sprouting out the top of the broken shells. Sure, it looks nice, but I had one burning question. “How long do people hold onto their eggshells?”
Straight off the bat, I had some concerns about this method. I think it’s one of those things that has become popular because it looks great in pictures but serves little to no real practical purpose.
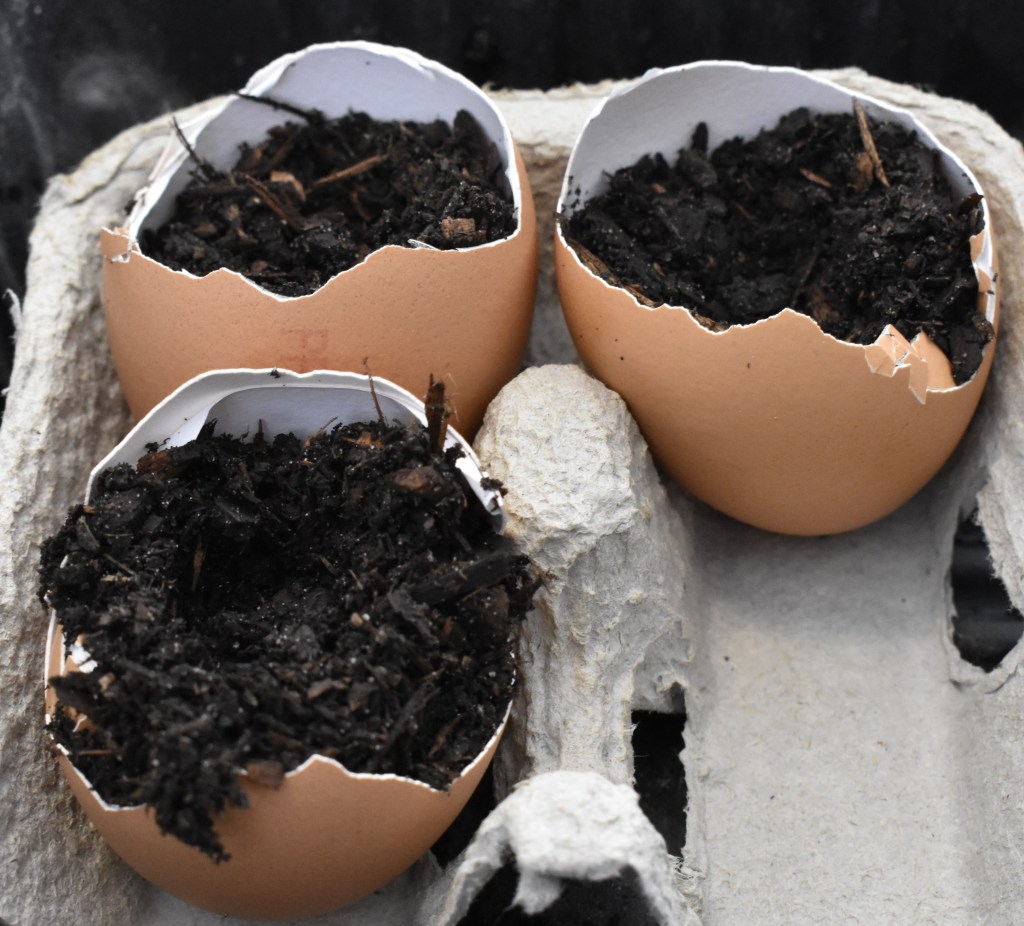
From what I have seen online, you can use the eggshell unwashed or washed. I saw some arguing that an unwashed shell allows more of the egg residue to enrich the soil you fill it with, but I don’t see that happening for the short length of time that the seed is sprouting in there, and I am concerned that the egg residue will lead to mould and bad smells. So, I opted to wash mine, but the choice is yours.
You start by poking a small hole in the bottom of your eggshell. This allows the soil to drain so they don’t fill with water. Then, gently fill the shell with your growing media of choice (you may need to use a tablespoon to spoon it all in gently) and the seed you wish to grow. And like everything else, give it a drink and let it sit in the sun.
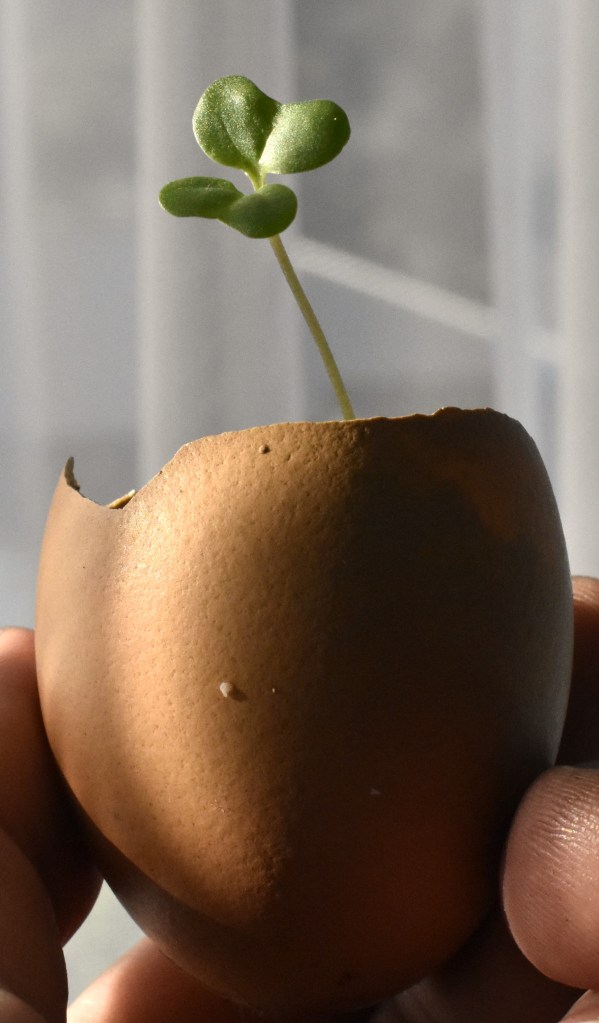
When you are ready to plant the seedling, squeeze the eggshell so it breaks. There is no need to remove the seed mix and seedling. You just need to crack the shell. If you don’t, the roots will become bound as they can’t escape the shell alone. Then you can plant it and the seedling as usual and let it do its thing.
To be honest, when I made a few for the sake of this post and a demonstration. I wasn’t really expecting anything to happen. But I was pleasantly surprised to find out it worked rather well. And the plants that sprouted from those seeds are now outside in my garden doing great things. It just shows that you shouldn’t really dismiss something until after you have tried it.
Toilet rolls
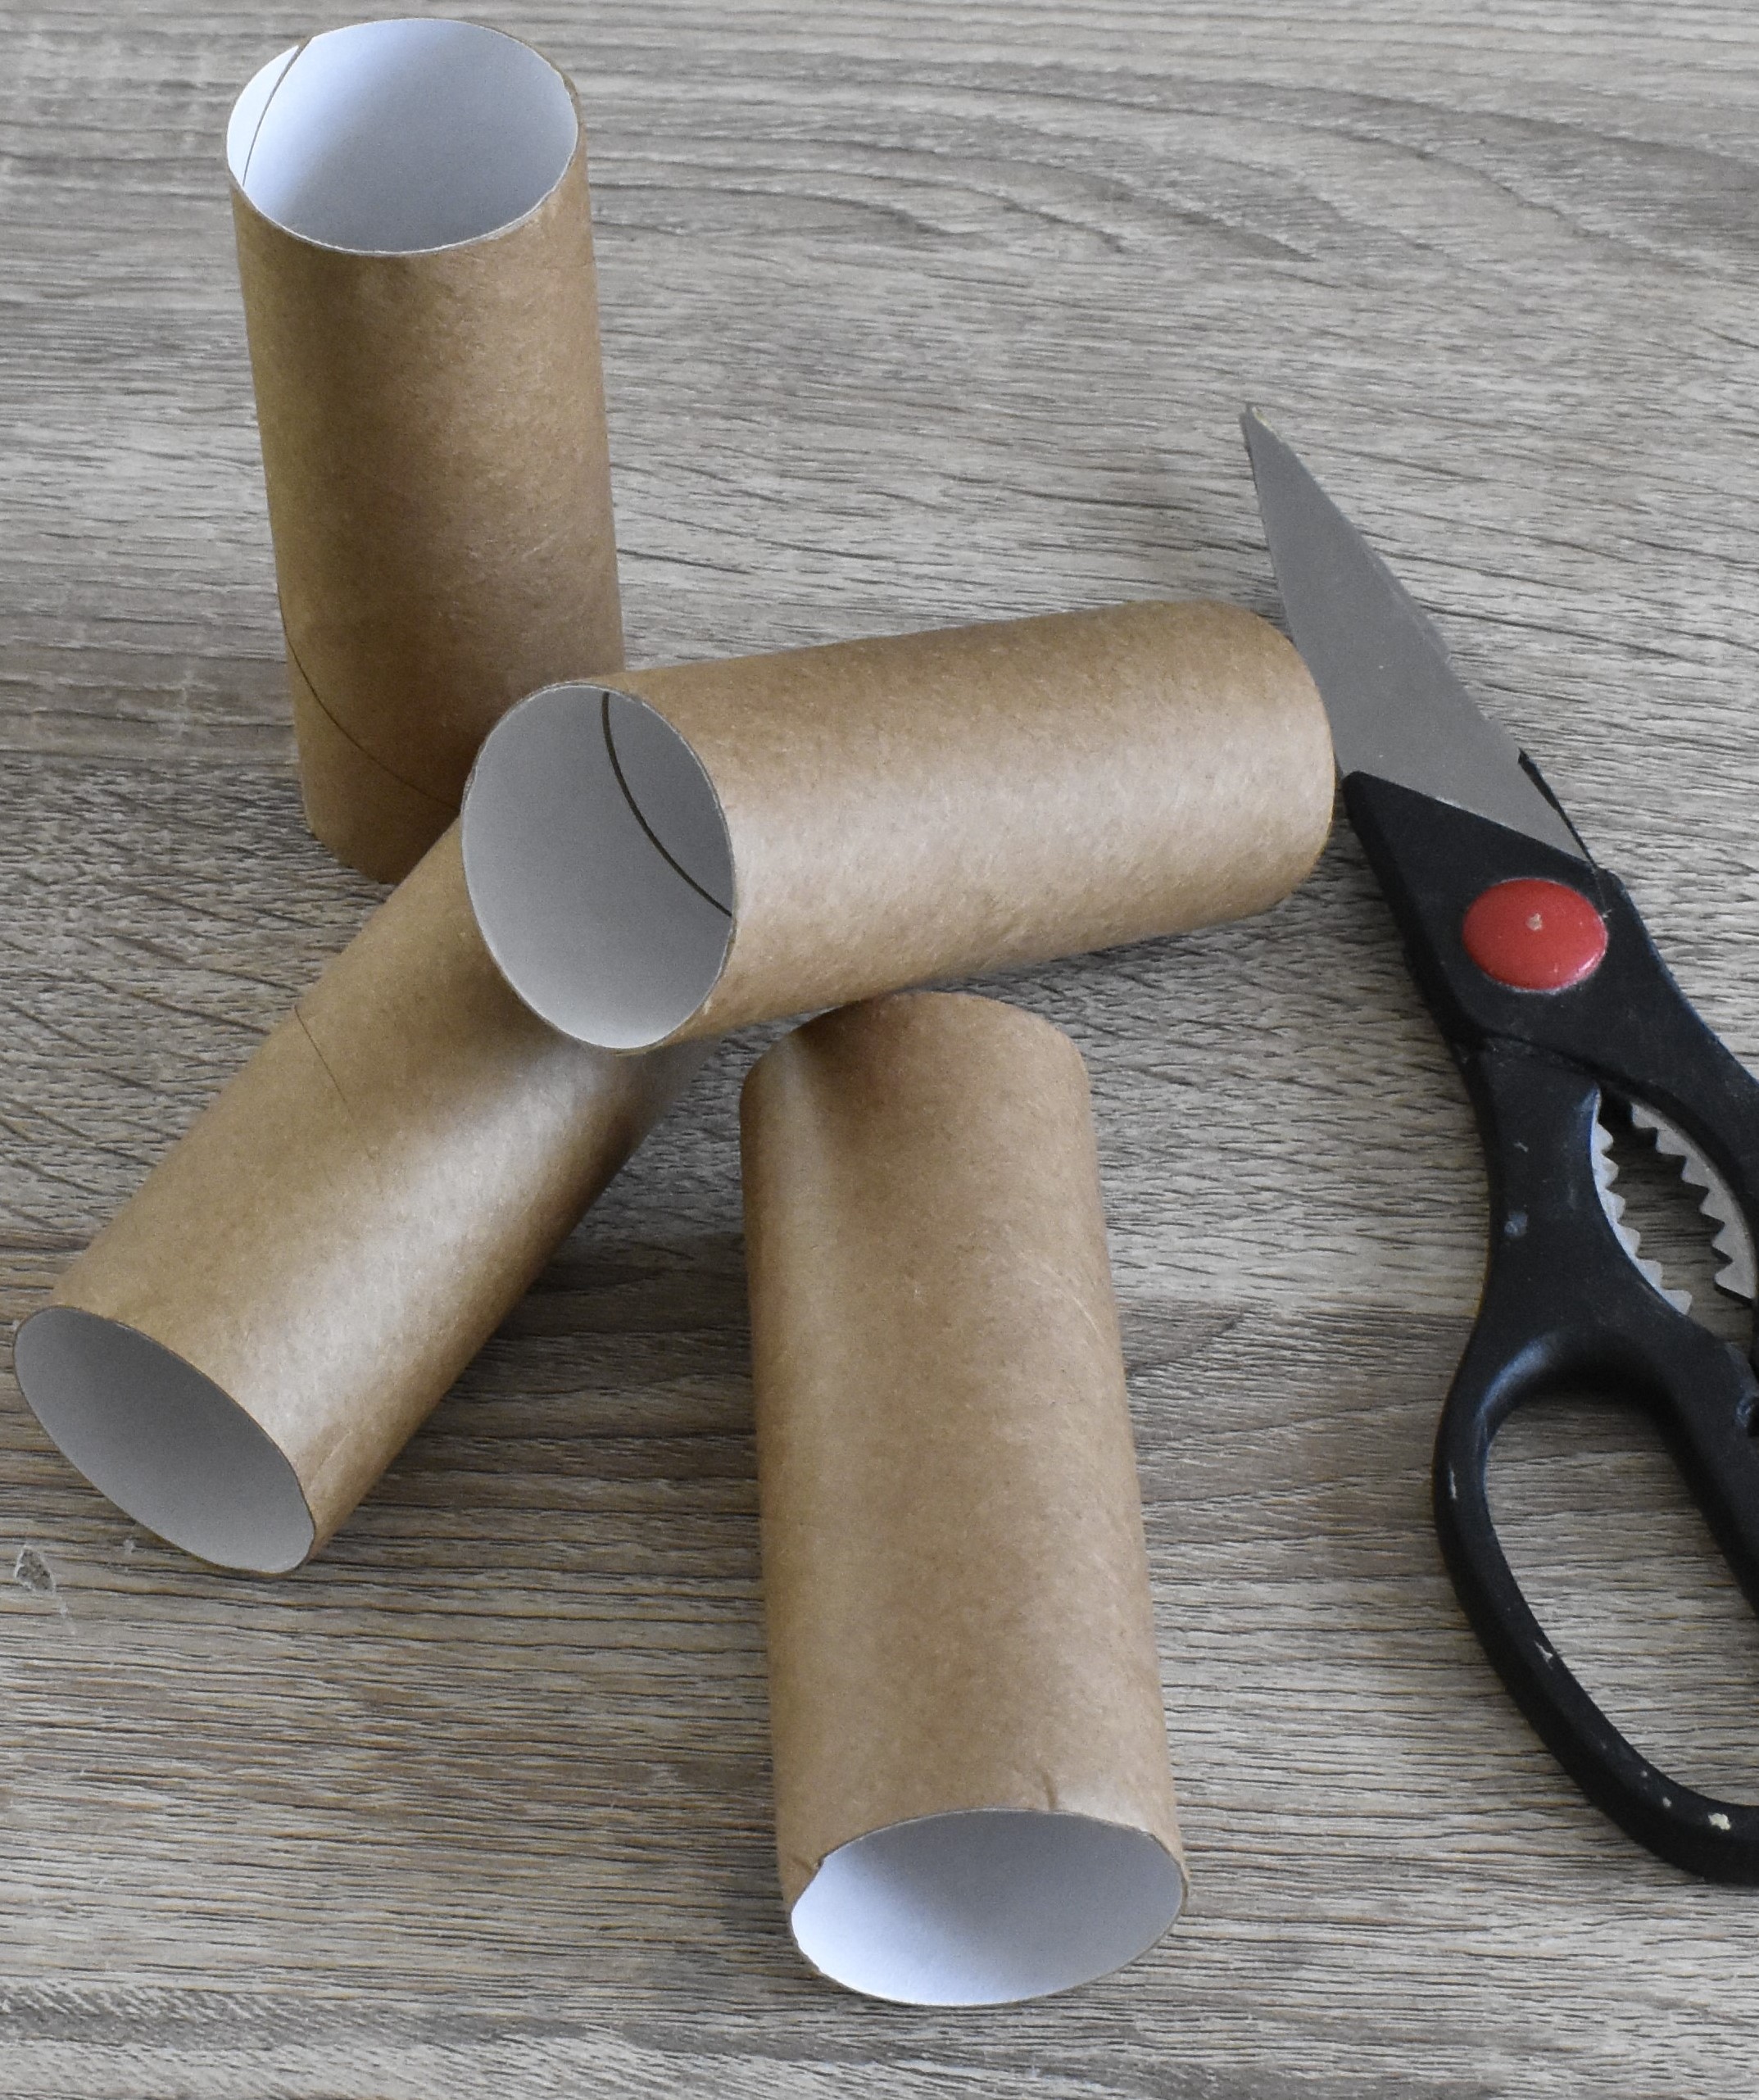
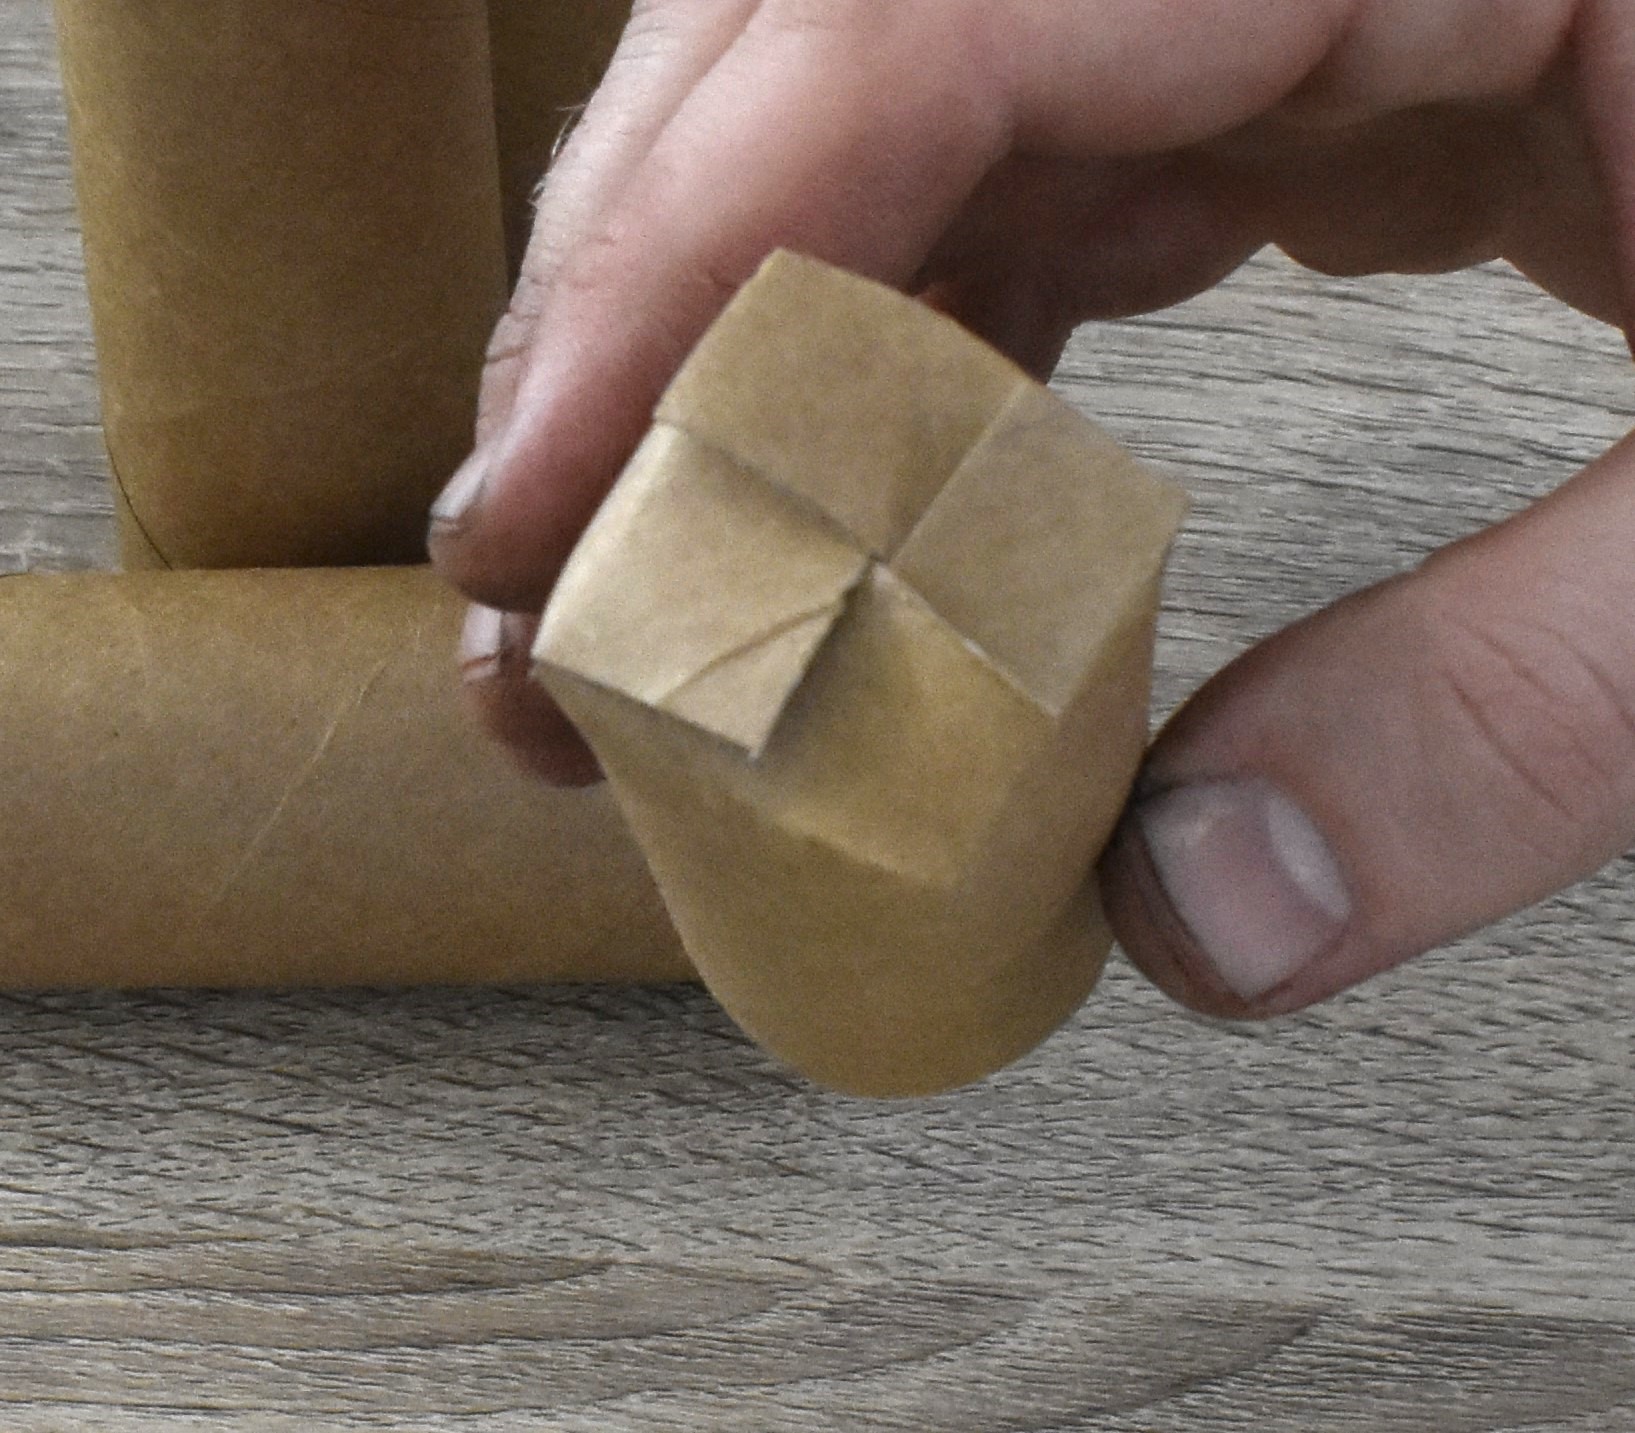
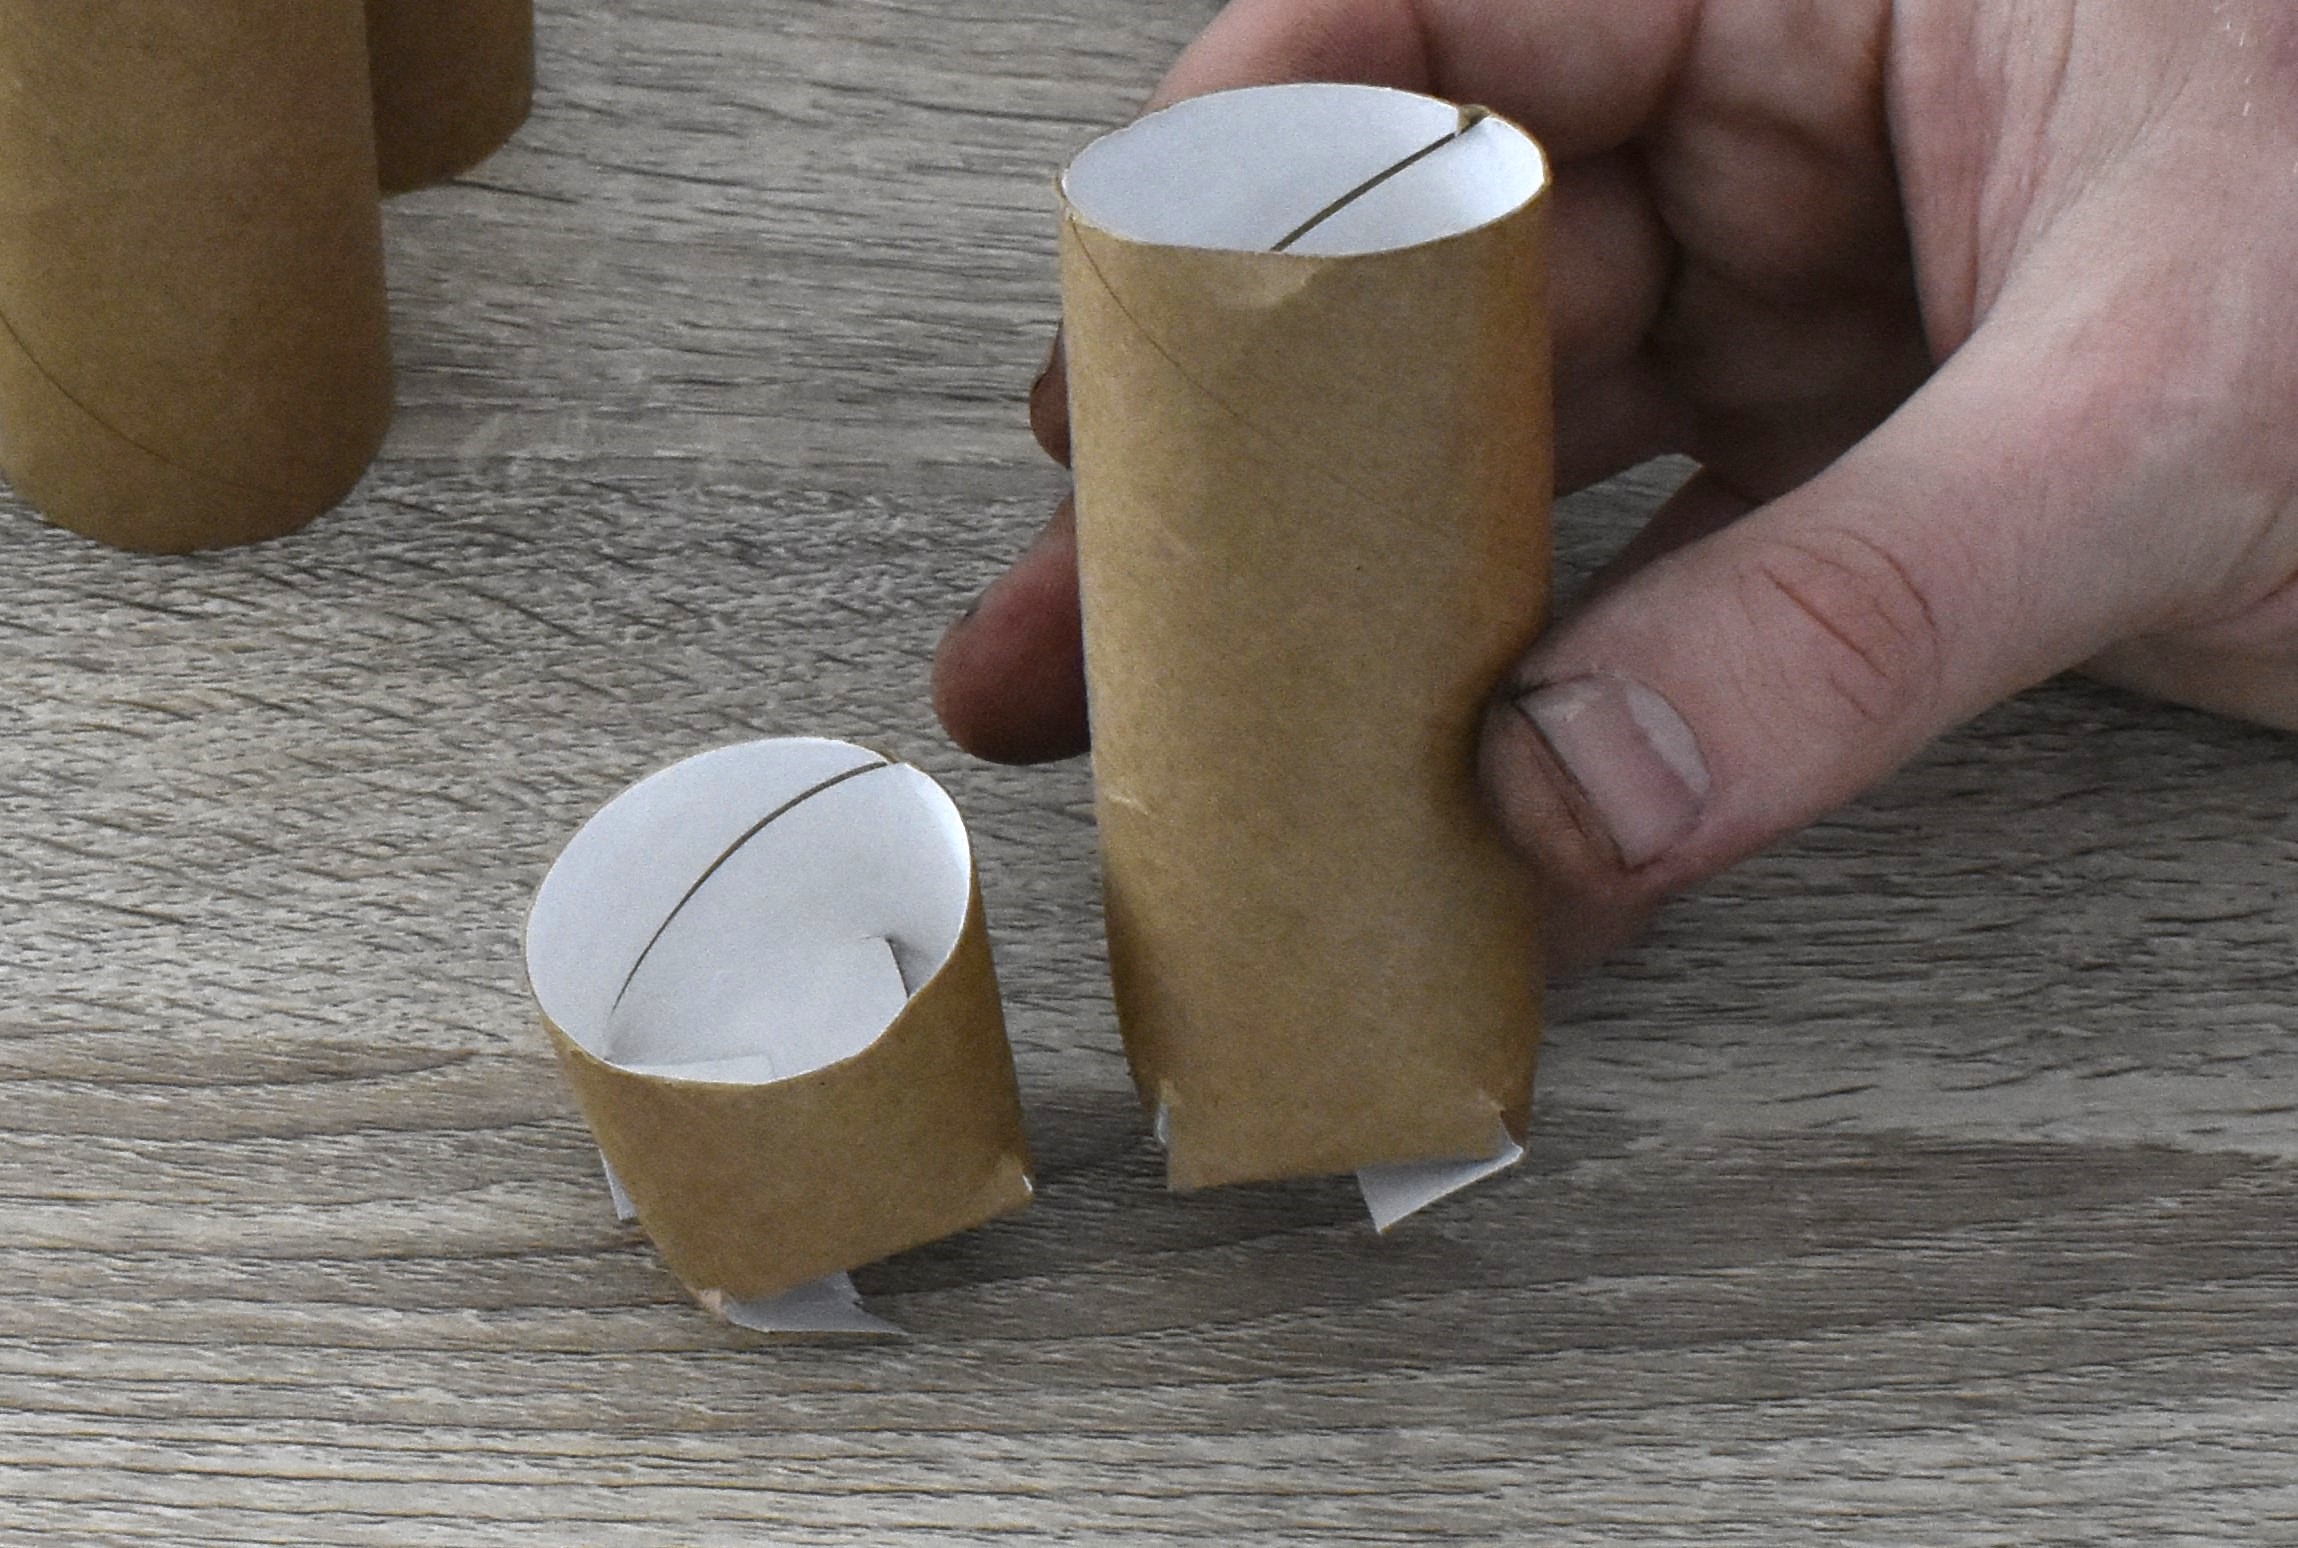
First, to clarify, I mean the cardboard tube inside the paper roll when I say toilet rolls. The best part of using these tubes is that you’ll always have them, and if you stash them away when you’re finished with the roll, you will never run out. I’ve only recently started using these for seeds over the past few weeks, and I like how it is turning out so far. Before filling them with growing media, you must close up one end of the tube. This gives it a base and keeps everything in place should you pick them up. To do this, make four cuts into the tube roughly two and a half to three centimetres long. You will now have four flaps that you simply fold over each other like you are closing a box. Tuck the last flap under the rest, and now you’re ready to fill it with dirt. You also have the option to cut the tube in half creating a smaller container.
I initially thought that when it came time to transfer the seedling, I would need to slide the soil and seedling out of the roll like you do with most tube stock plants. But I was surprised to find that, like the egg cartons, the cardboard had gone soft enough not to be a problem by the time the seedlings were ready to be transferred. So all I did was open the flaps at the base of the roll so the roots could keep growing and plant everything, tube and all, in the ground.
Plastic trays or food containers
Every now and then, a friend of mine gives me these little black trays. Initially, they would have a meal inside them, and once the meal was consumed, the trays would be thrown out. Thinking this was wasteful, he took them home and used them around his home and garden. With time, he wound up with more containers than he needed and offered me some. And as much as I am trying to cut back on my reliance on and use of plastics, they are handy for the garden and starting my seeds in. so I happily take them when offered as although they are plastic, by taking them, I am preventing them from ending up in landfill and by recycling them I don’t have to buy any new plastic containers.
Some supermarkets use similar plastic trays to package their meats. I am including this in the list to demonstrate that the packaging of your groceries can be used for far more than just storing and transporting food. You can use the tray your sausages or steak comes in elsewhere in the garden or around the home.
To use them for the garden, I drill or cut small holes into the bottom of one for drainage, fill it with potting mix, insert it into a tray without holes, and then sow my seeds. When they need to be transferred, I pick them out and put them wherever I like. They are pretty much a smaller, low-budget, homemade seed flat. And they work well. So next time you are grocery shopping or cooking, have a look at the packing of your food and consider if you can use it somewhere else before you throw it away.
Paper towel
The last one for today is the paper towel method. Despite my many attempts, I have had mixed results when it comes to using paper towels for raising seeds. In my last post, I had a crack at it. I had to remove a few of those seeds because of mould, and I gave up on the rest as nothing was happening. I tried again, this time using sunflower and tomato seeds, and surprisingly it worked. As I said, my experience is mostly hit or miss. Because of this, I only use the paper towel method for growing succulent cuttings.
There are two ways you can use this method. The first is to use a Ziploc bag, place a paper towel and the seeds inside, give them a light water using the mist setting of your spray bottle and then keep them in a sunny location until they sprout.
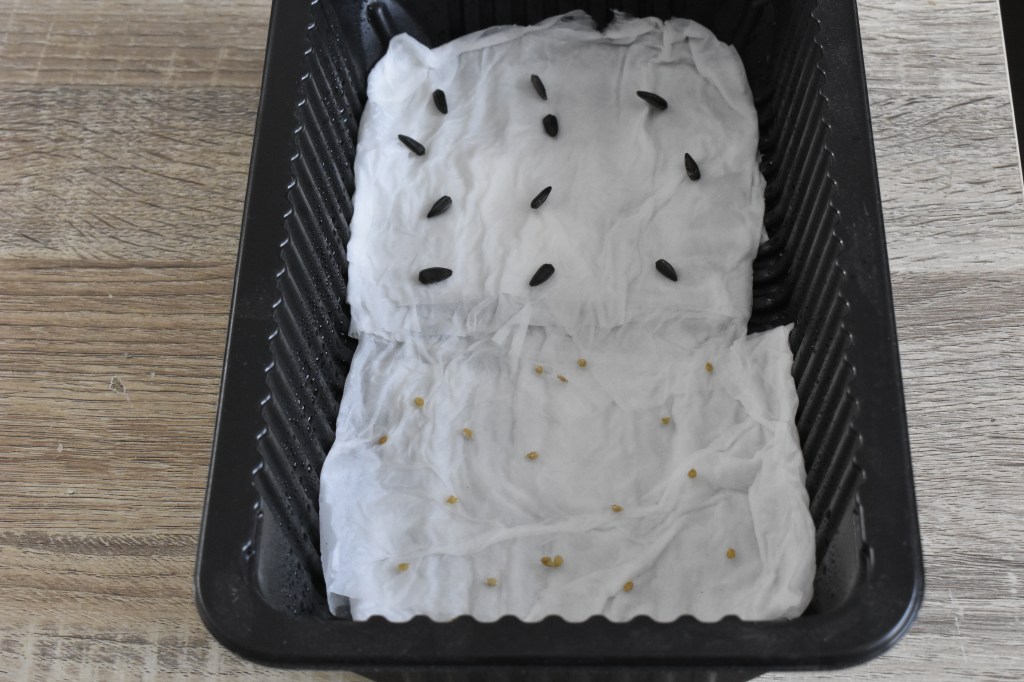
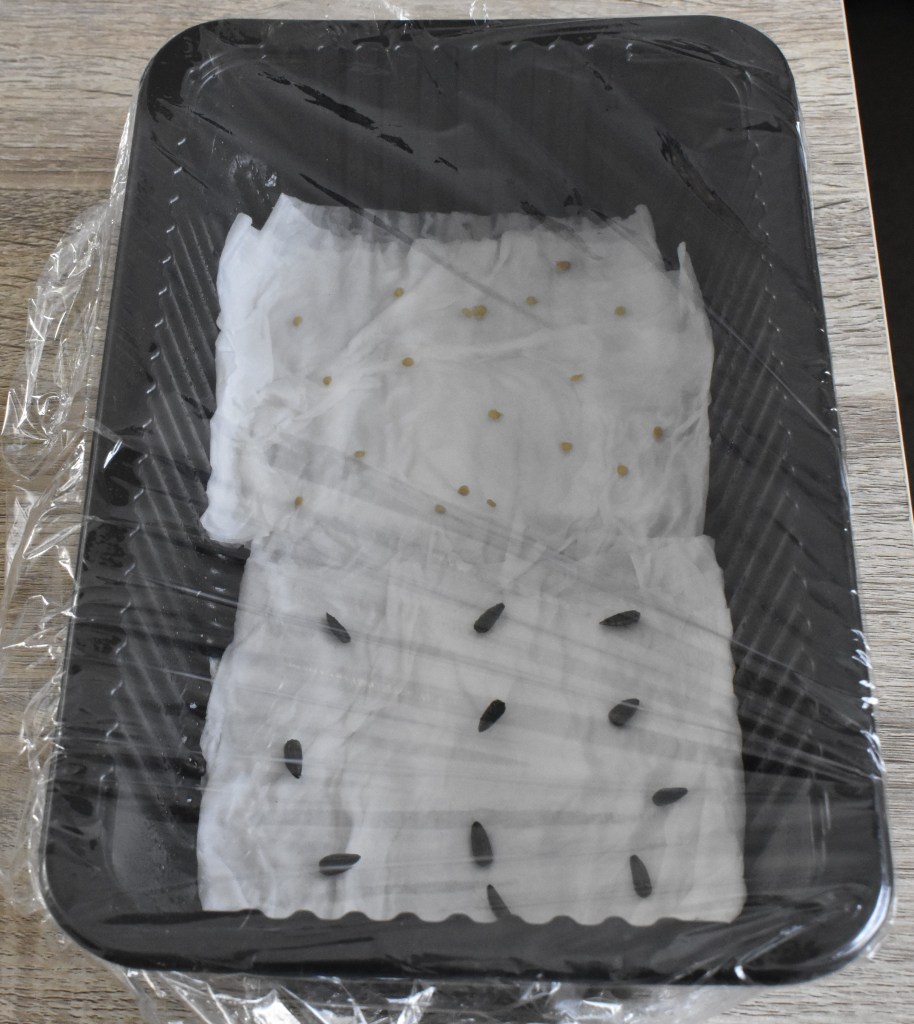
The second option is the one I decided to use for this post. Instead of a Ziploc bag, I used a plastic tray, placed the paper towel onto the tray, and then scattered the seeds. I gave them all a good watering and covered the tray with a layer of cling wrap. If you have a large freezer or ziplock bag, you can put the tray inside and close it up. It will do the same thing as the cling wrap.
As soon as the seeds sprout and develop a root, you will need to transfer them into a proper growing media, as they won’t last long if left on the wet paper towel. The second time around, I had more success using this method. I still lost one or two to mould, but I had more seedlings sprout than I had on my first attempt. Despite my difficulties and thoughts with this method, I still recommend you give it a go, as I have a friend who regularly uses paper towels to start his seeds and gets fantastic results.
And that is all I have for you today. In some way, getting side tracked for the past month was rather beneficial for this post. It allowed me to try and have a solid attempt with some of these ideas. And that has allowed me to reconsider my thoughts regarding some of these methods. And as far as I’m concerned, it’s always good when you are challenged to think differently.
As always, I hope you have gotten something out of this, and I apologise again for the delay in posting this. Now life has settled down properly, I can get back into my regular posting routine. So, until next time, thanks for dropping by. Have yourself a good one, and I will catch you later.

Leave a comment