Hello, and welcome back. I hope that life has been treating you well. As discussed last week, today I will share how you can deconstruct a chicken. As intimidating as it sounds, I’m sure you will be comfortable enough to try it and see how easy it is after this post.

Why would you want to deconstruct a chicken? I hear you ask, especially when you can purchase the cuts you need when you need them. The answer is easy, convenience. The more convenient a service or product is, the more it will cost. Deconstructing a chicken takes a little more effort, but once you get the hang of it, it becomes a quick and easy job that saves you a bit of money. For this demonstration, I purchased three whole chickens. Each chicken I bought cost roughly $15-17, depending on weight; my total was just under $50. At the same store, I see a packet of two breasts selling for anywhere from 11 to 18 dollars. So even if I purchase one whole bird, I still get more bang for my buck. By cutting up the three I bought, I now have six breasts, six legs, a serving of wings and three carcases I can use to make stock. That gives me enough meat for roughly 12 meals, and I can use the chicken stock to boost the flavour of other dishes. This is another bonus because I don’t have to buy bullion cubes or use liquid stock, as they are both notorious for being nothing but salt. As much as I am all for cutting up whole birds, I understand and agree that sometimes it pays to purchase the cuts you’re after; a great example is wing night. Buying a pack of wings will work out easier and cheaper than breaking down a few dozen carcases.
So without any further ado, here is me cutting up a chicken.
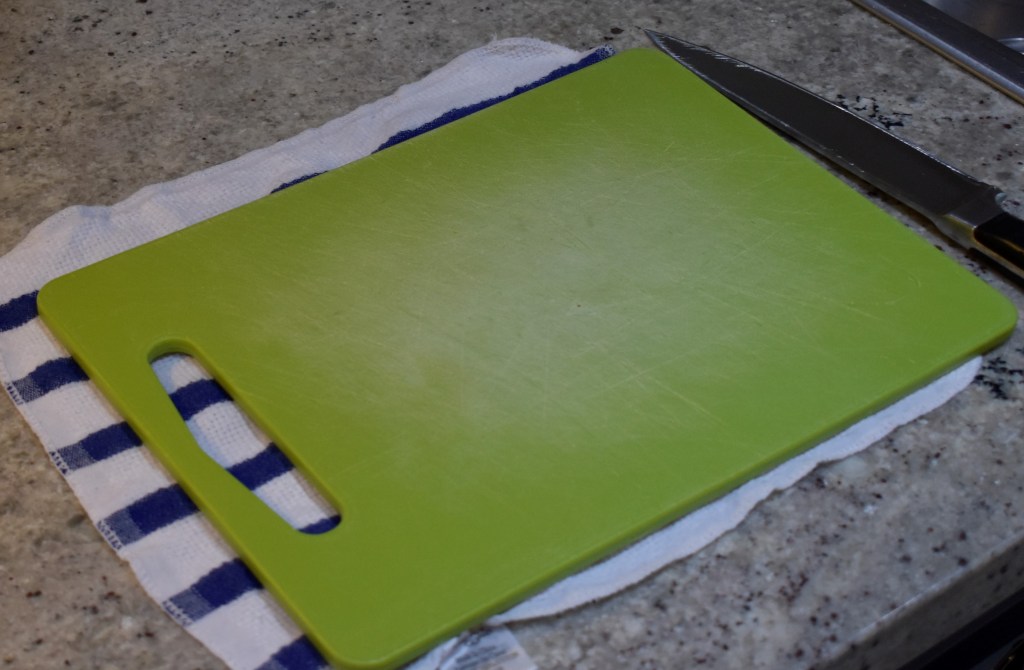
Equipment used.
Back when I was at culinary school, they taught us how to do this with just the three pieces of equipment I have listed below. I have since seen other people perform the same task with other tools like kitchen scissors or more than one knife, but today I will keep it simple and just use the three below.
- Cutting or chopping board. I placed a damp cloth under mine to prevent it from moving.
- Chefs knife. If you have a proper cleaver that is in good condition you could use that as well.
- Plate or tray. A plate or tray to place the cut pieces of chicken onto to clear up space on your board.
Breaking down the chicken.
Before we go any further, I want to remind you that we are cutting up bits of chicken that have bones similar in size to your finger bones. Nearly all of our cuts will be made through the joints, making the job easier and preventing shards of bone from getting in your meat. The problem with this is that the bones and knife could roll and if you’re not careful, you could cut yourself or worst-case scenario, lose a finger. So always ensure your fingers are out of the knife’s way and you have a good hold of the chicken as you make the cuts to prevent slipping.
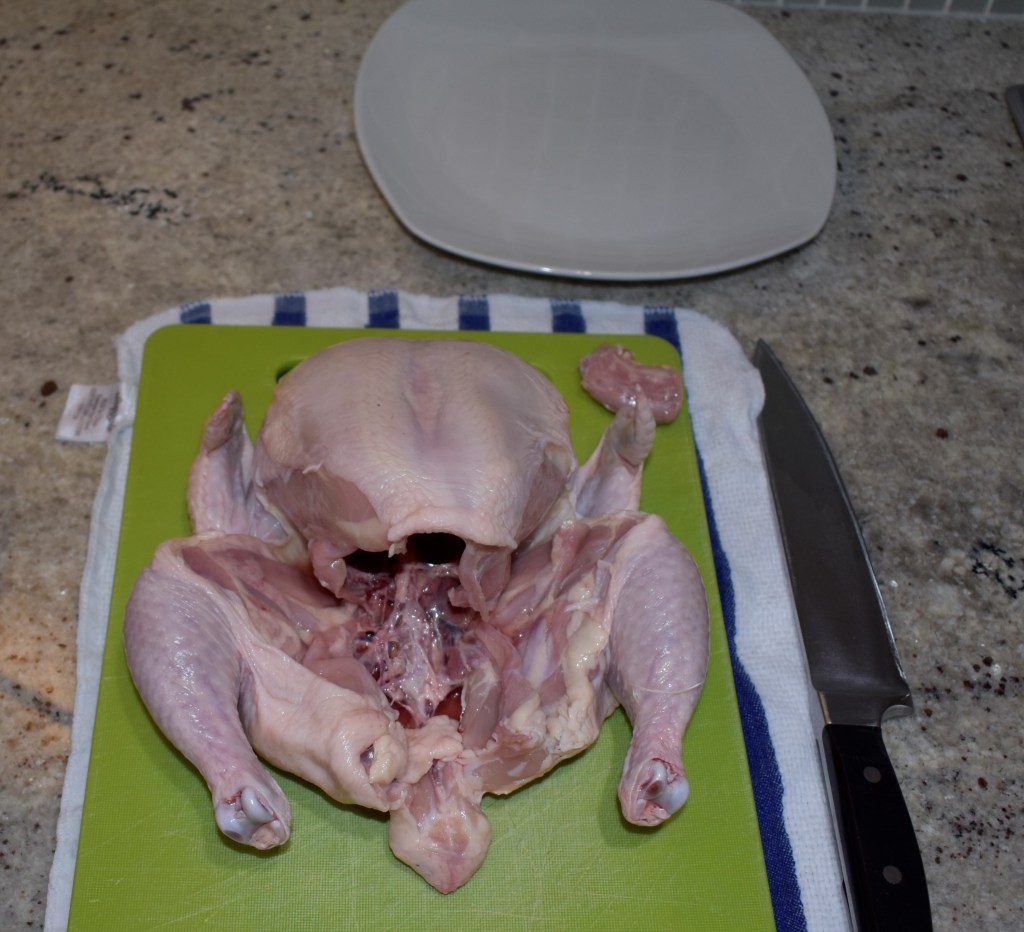
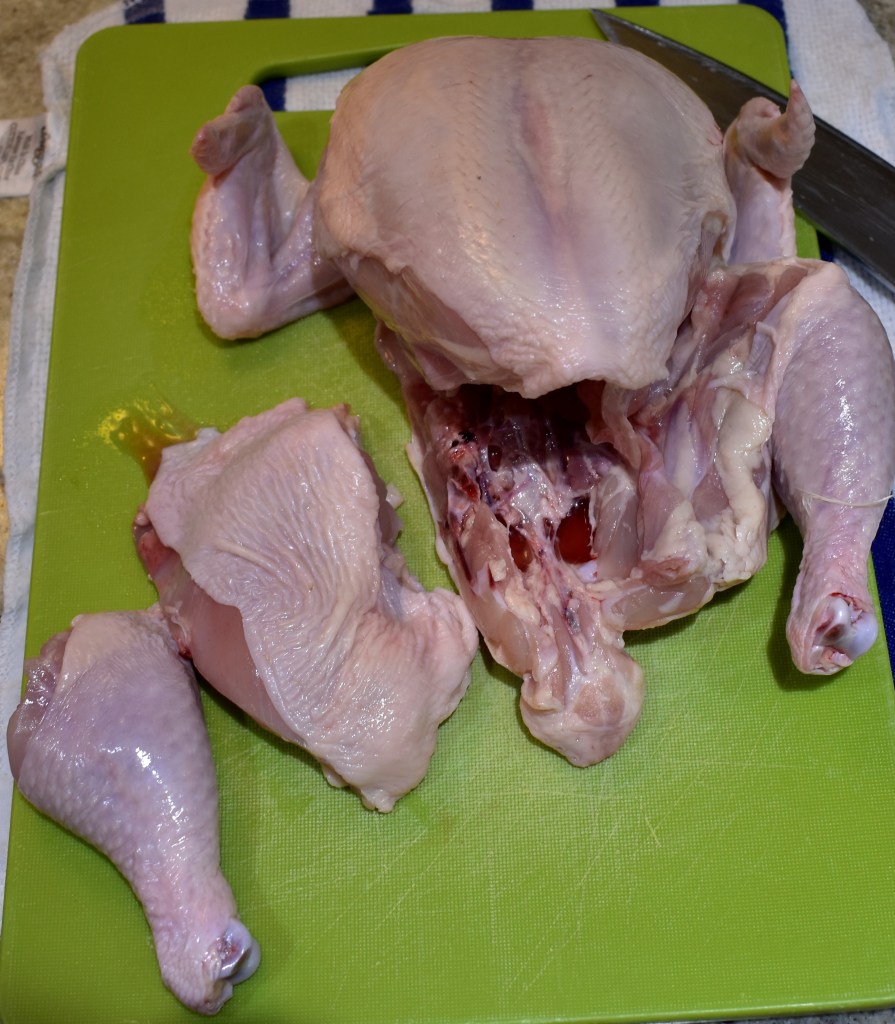
- Take the chicken from its packaging, and if there is any string holding the legs together, remove them. If you like, you can check the cavity of the chicken for gizzards. I found a bit of neck in one of mine, so I added it to the stock pot.
- Hold down one of the chicken legs and feel for its “hip” joint. You may need to cut back the skin so the leg will come away from the body, allowing you to see what you’re looking at. Once you’ve found the thigh joint, position your knife along the body, get a good grip on the chicken and knife, and make the cut with the blade over the middle of the hip joint.

When the thigh is attached to the drumstick like this, it is called a leg or a maryland. A chicken maryland is my favourite cut as one maryland is the perfect portion of meat for a person, and it presents well on the plate. For the purpose of the demonstration, I will break it down further.
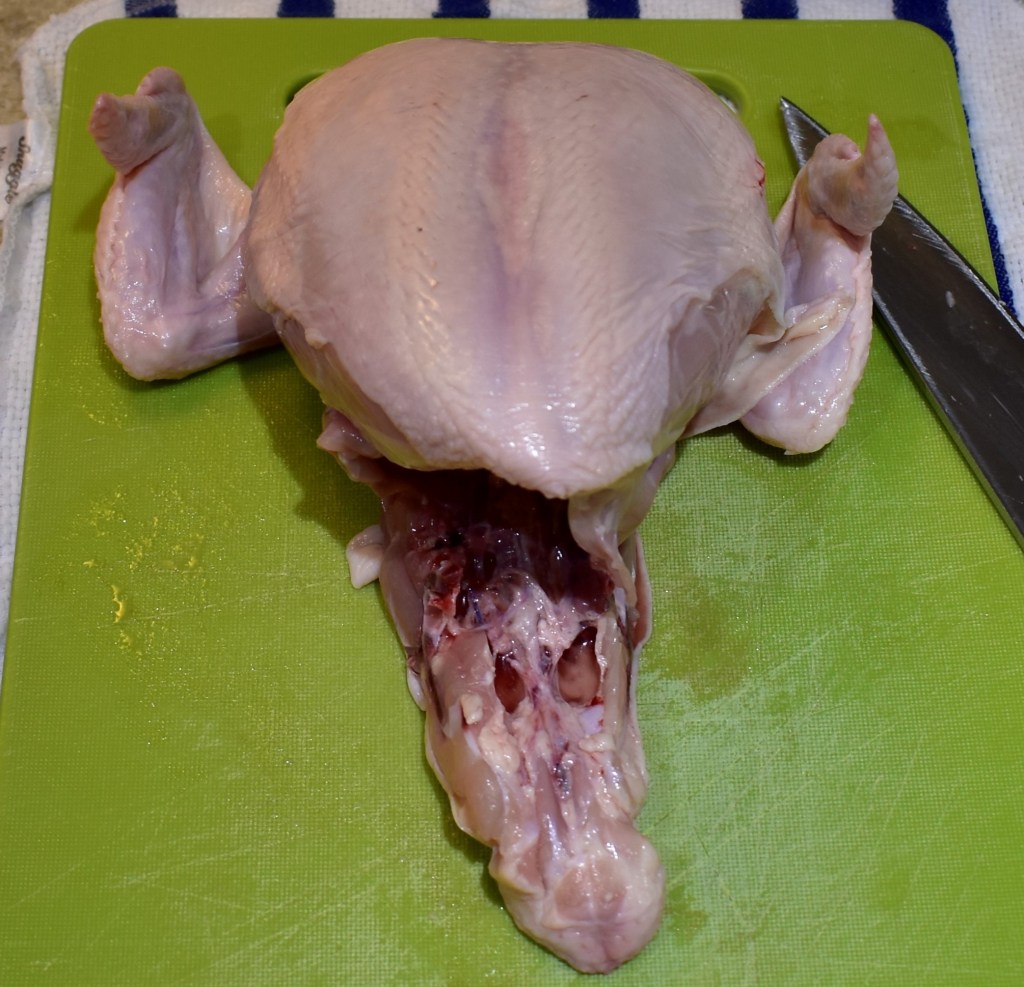
- Feel for the joint between the thigh and the drumstick. if you look at the inside of the leg, you can see a thin line of fat running between the two cuts. This is generally a good indicator as to where to cut. Once you have found the joint, firmly hold the leg and cut through it. And there you have a separate drumstick and thigh.
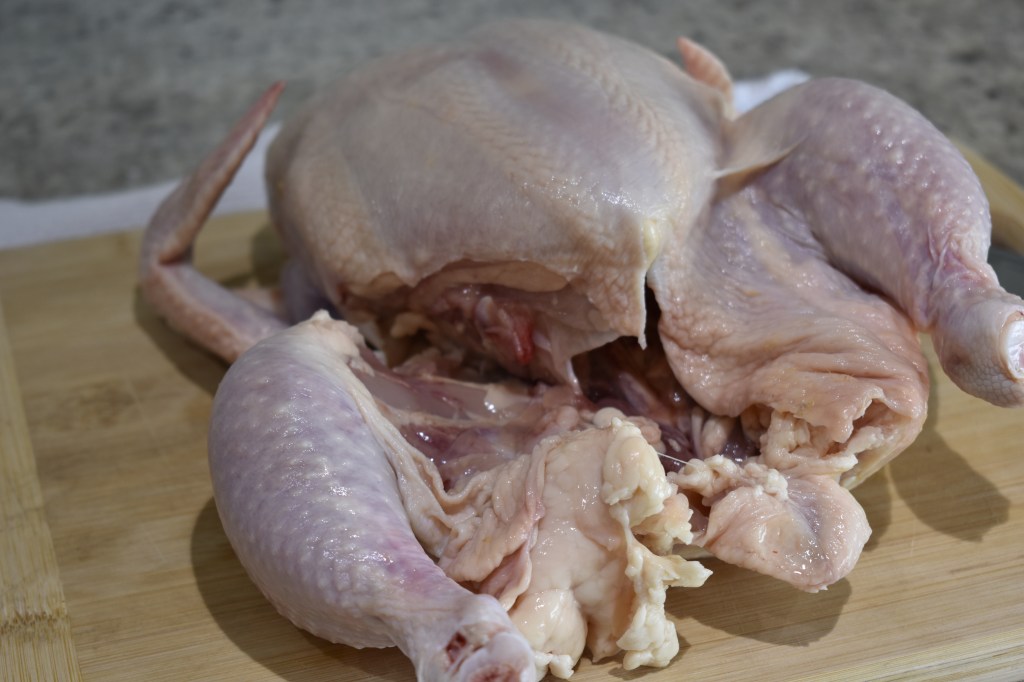
- Place the cuts aside and repeat the previous steps on the other leg. Once complete, your chicken should look something like this.
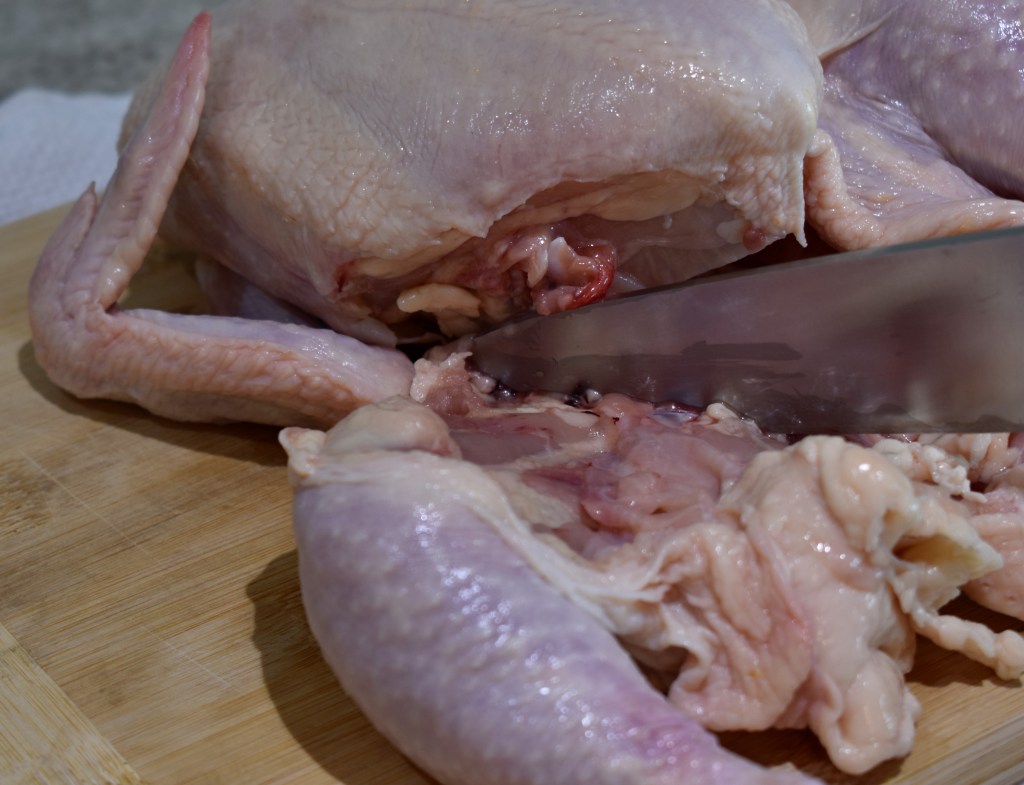
- Now we turn our attention to the wings, feel for the shoulder and cut through the joint once you’ve found it. And now you have a whole wing. If you want to keep it as is, put it aside, but we will take it a little further and break it down.
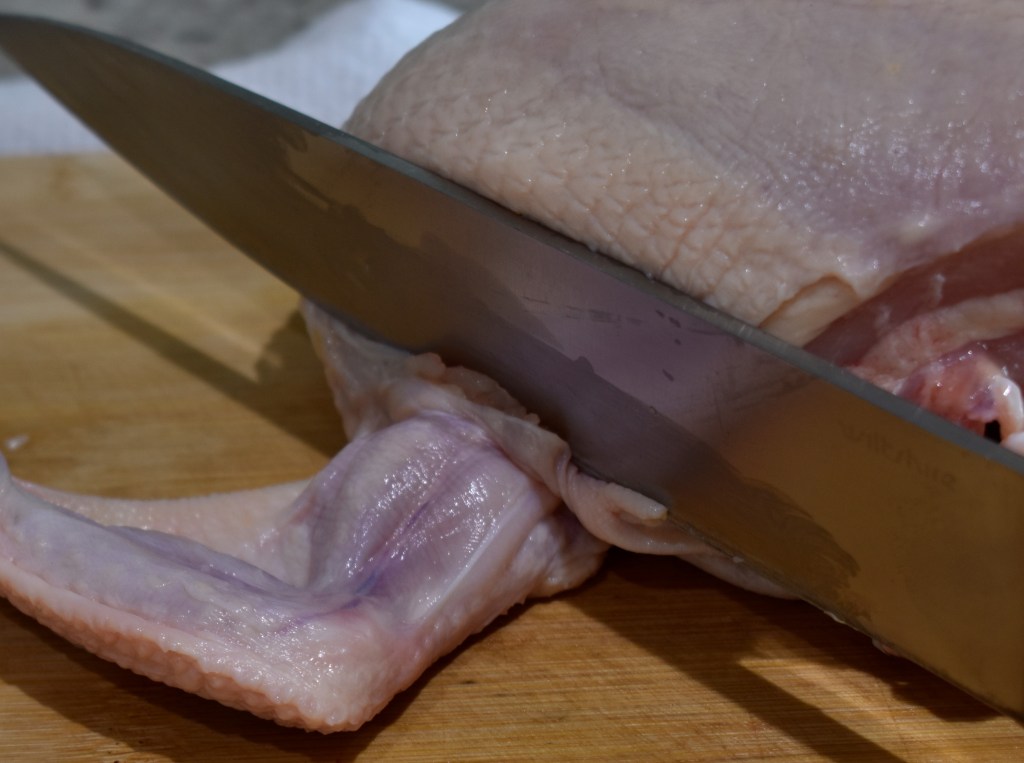
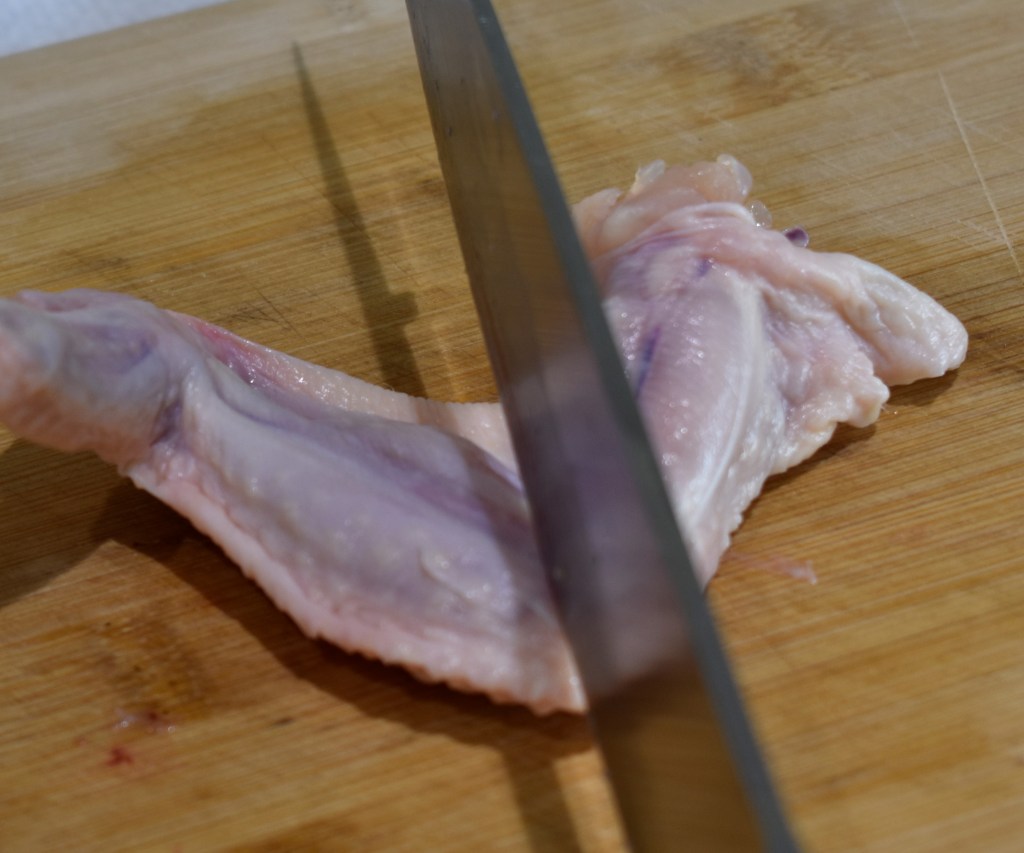
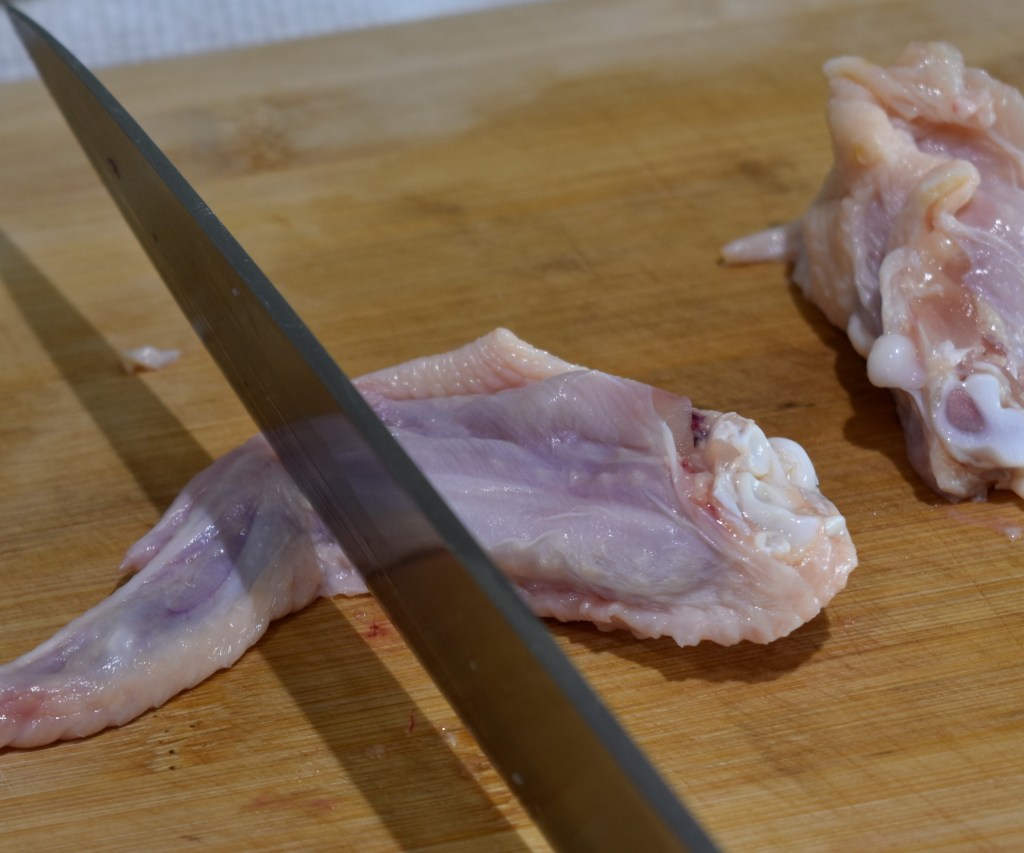
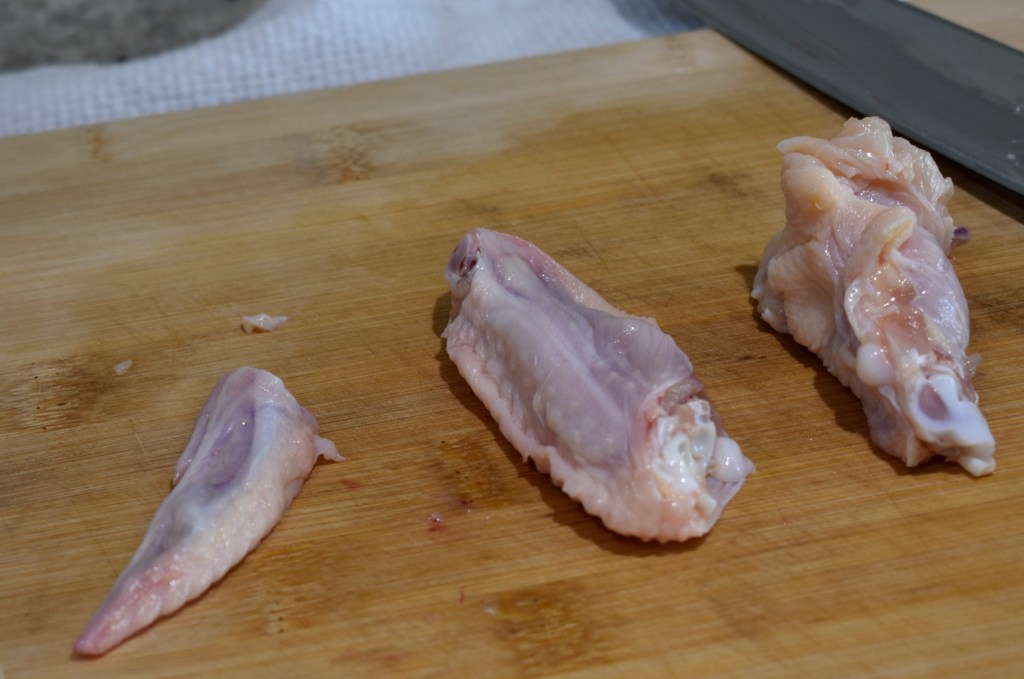
- This part is a little easier as the joints can be seen easily. To break it down further, cut through the other two joints. This will leave you with the wing tip, wing midsection and drumette. The wing tips are great for adding to the stock, while the midsections and drumettes can be saved for wing nights, depending on how many I have; I mix them in with the wings I purchase from the store, or I store them in the freezer and wait till I have enough for a decent feed.
- Repeat the last two steps on the opposite wing and put the cuts aside.
- Now we have to remove the breasts. A small T-shaped piece of cartilage runs down the centre of the chicken’s chest, separating the breasts. You will want to slice down to the ribs just to one side of the cartilage, making sure not to cut through or crush them. Depending on the bird, you may be able to feel out the cartilage before you cut.

- Once your knife hits the ribs, angle the blade to match the angle of the rib cage and gently slice the breast meat away from the bones. Continue slicing until you have a whole breast in one hand. You may also accidentally cut through the wishbone; if you do, it can easily be pulled out.
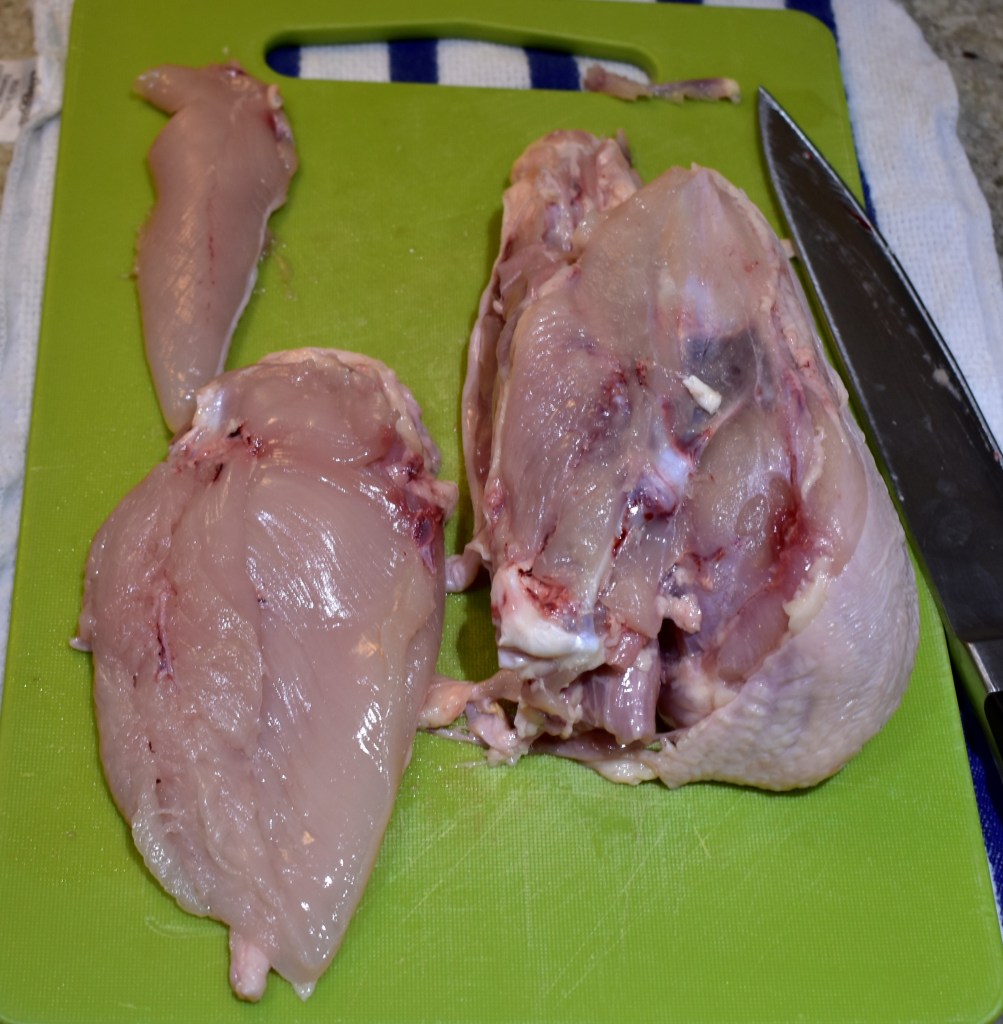
- If you wanted to take things one step further, you could remove the tenderloins from the breasts, but I choose to leave them on. Repeat the last step on the opposite side of the chicken. And finally, you should have two breasts and a chicken frame; a chicken frame is the chicken’s carcass with no meat left on it.
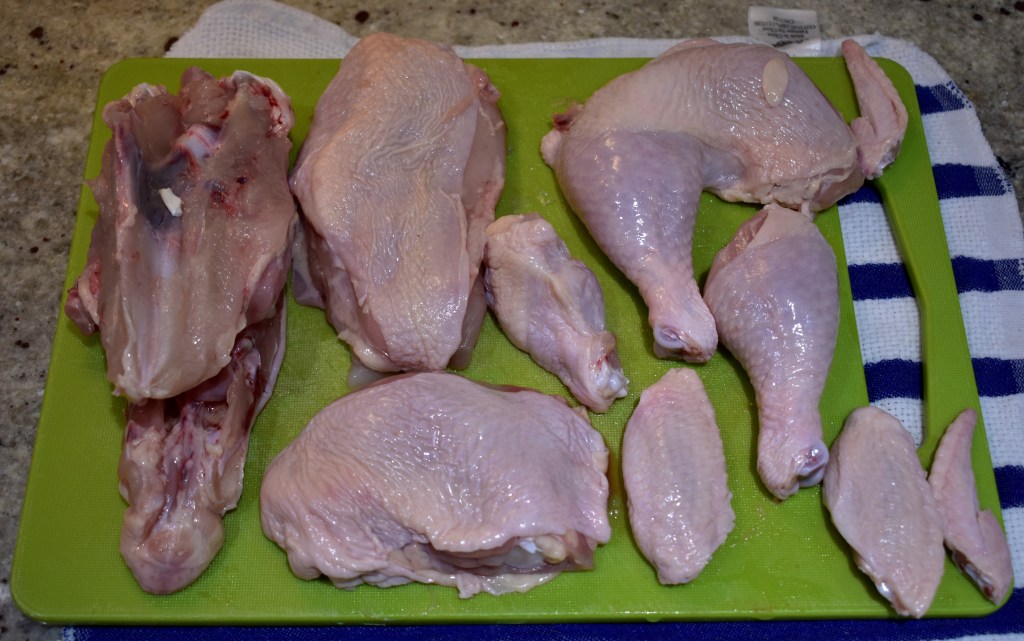
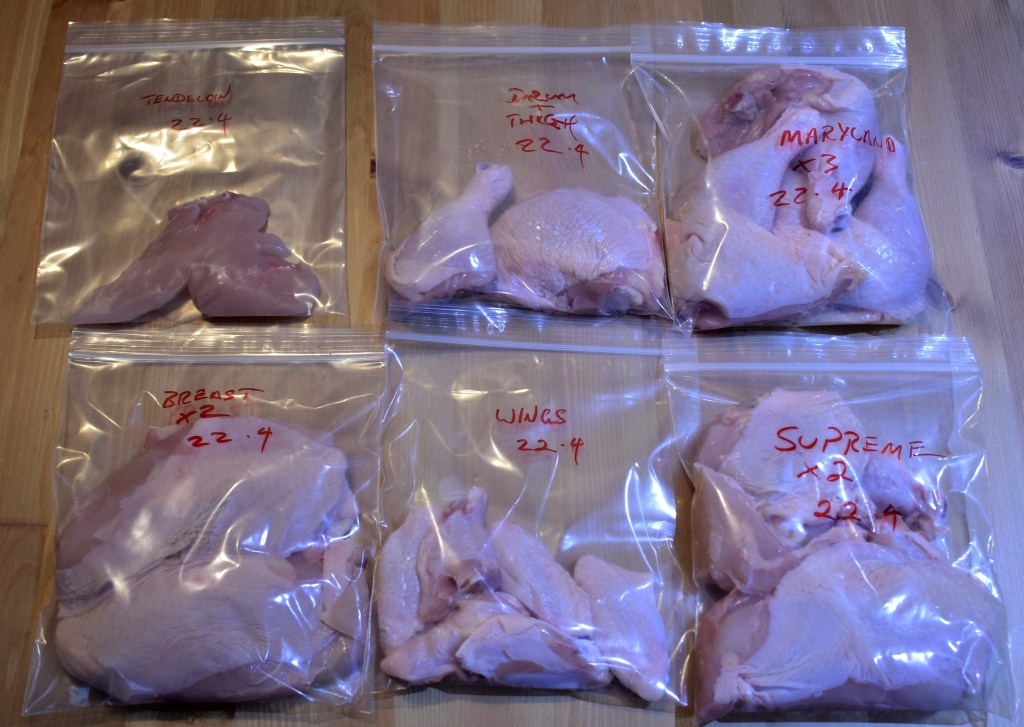
And there you have it, a deconstructed chicken. Any bones or offcuts can be frozen along with the frame so you can make stock when you have enough. The rest of the meats can be packaged and frozen down; I like to label the bags with what’s in there and the date it was frozen, so it’s easier to keep track of what’s in my freezer.
Also, I should add that, like the old saying, “There are a hundred ways to skin a cat”, the same is true for dealing with chickens. There are plenty of ways to cut them; if you are after a small portion of chicken for roasting, you could always quarter it, or some people like to cut the breast so it is still attached to the ribs. It all comes down to what you want and how you want to use it.
This whole idea works with beef as well; I will buy the larger cuts intended for roasting and break it down into steaks, diced chunks and strips for stir fry. I can save a considerable amount of money with a little effort. And with how food and meat are currently priced, getting more bang for your buck has never been more critical. So try it, and let me know how you get on. Until next time have yourself a good one, and I will catch you later.

Leave a comment